
You're driving along a rural Ontario road when a yellow diamond sign appears ahead. Its short slanted lines seem to lean toward a ditch at the pavement's edge. The road feels narrower, the shoulder looks soft, and you have only a moment to decide whether to brake, steer, or continue.
That sign is easy to misread because it doesn't just say “watch out.” It gives you a directional clue. The lines show where the hazard is located, and you pass on the clear side away from it. Understanding that detail helps you answer the G1 question correctly and respond more safely when the same situation appears on a real road.
A Common Moment on Ontario Roads
You're travelling on a Regional Road outside a small Ontario community. The pavement is dry in the centre but broken near the outside edge, where gravel blends into a shallow ditch. After a bend, you notice a faded yellow diamond sign. The short lines on the sign slope downward toward the right.
Your first thought might be, “Is this warning me about a curve?” It isn't. The sign points to a hazard close to the edge of the road, and the downward lines identify the side where that hazard sits. If the lines point toward the right, the dangerous edge is on the right. You should keep a steady position away from that edge and pass on the clear side indicated by the sign.
A new driver often reacts by staring at the ditch, braking sharply, or moving too far toward the centre line. None of those responses is the main lesson. The safer response is controlled: ease off the accelerator, keep both hands on the wheel, look well ahead, and maintain a stable lane position.
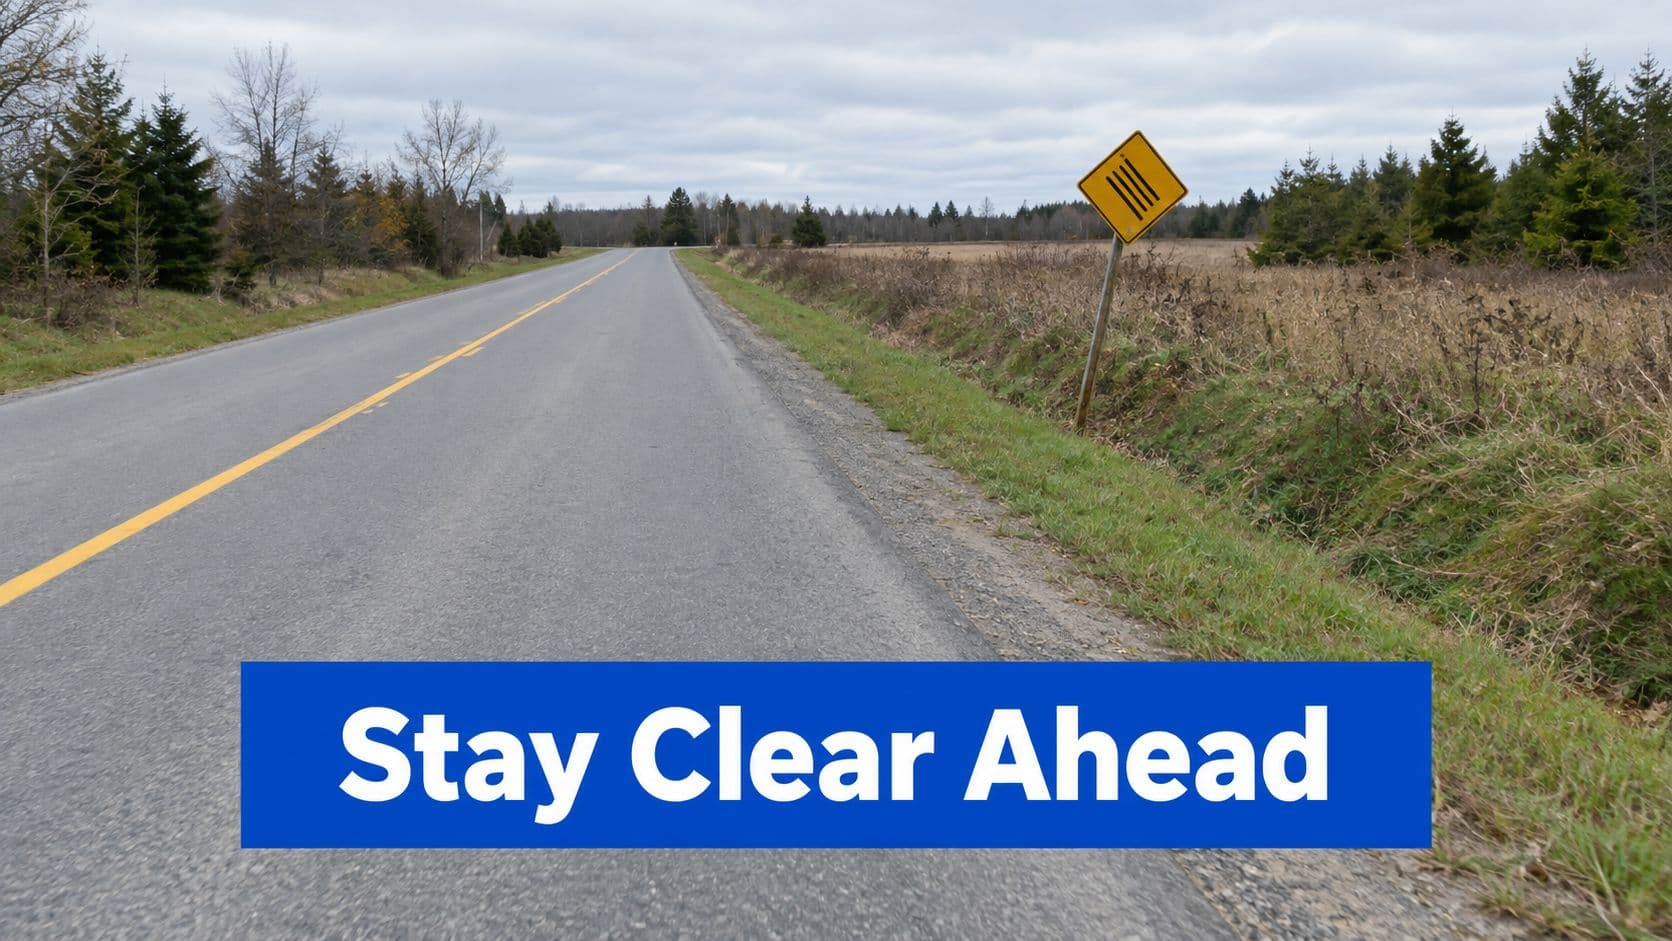
Ontario roads can change quickly between paved lanes, gravel shoulders, culverts, and drainage ditches. A warning sign may appear before the actual problem, giving you time to prepare rather than forcing an emergency manoeuvre.
This guide connects the sign's G1 meaning to the roadside design principles used in Ontario. You'll learn what the lines mean, which hazards they can identify, how to position your vehicle, and how test questions disguise the correct answer with tempting but unsafe choices.
Remember the scene: the lines point toward the hazard, not toward the side you should choose.
What the Sign Actually Means
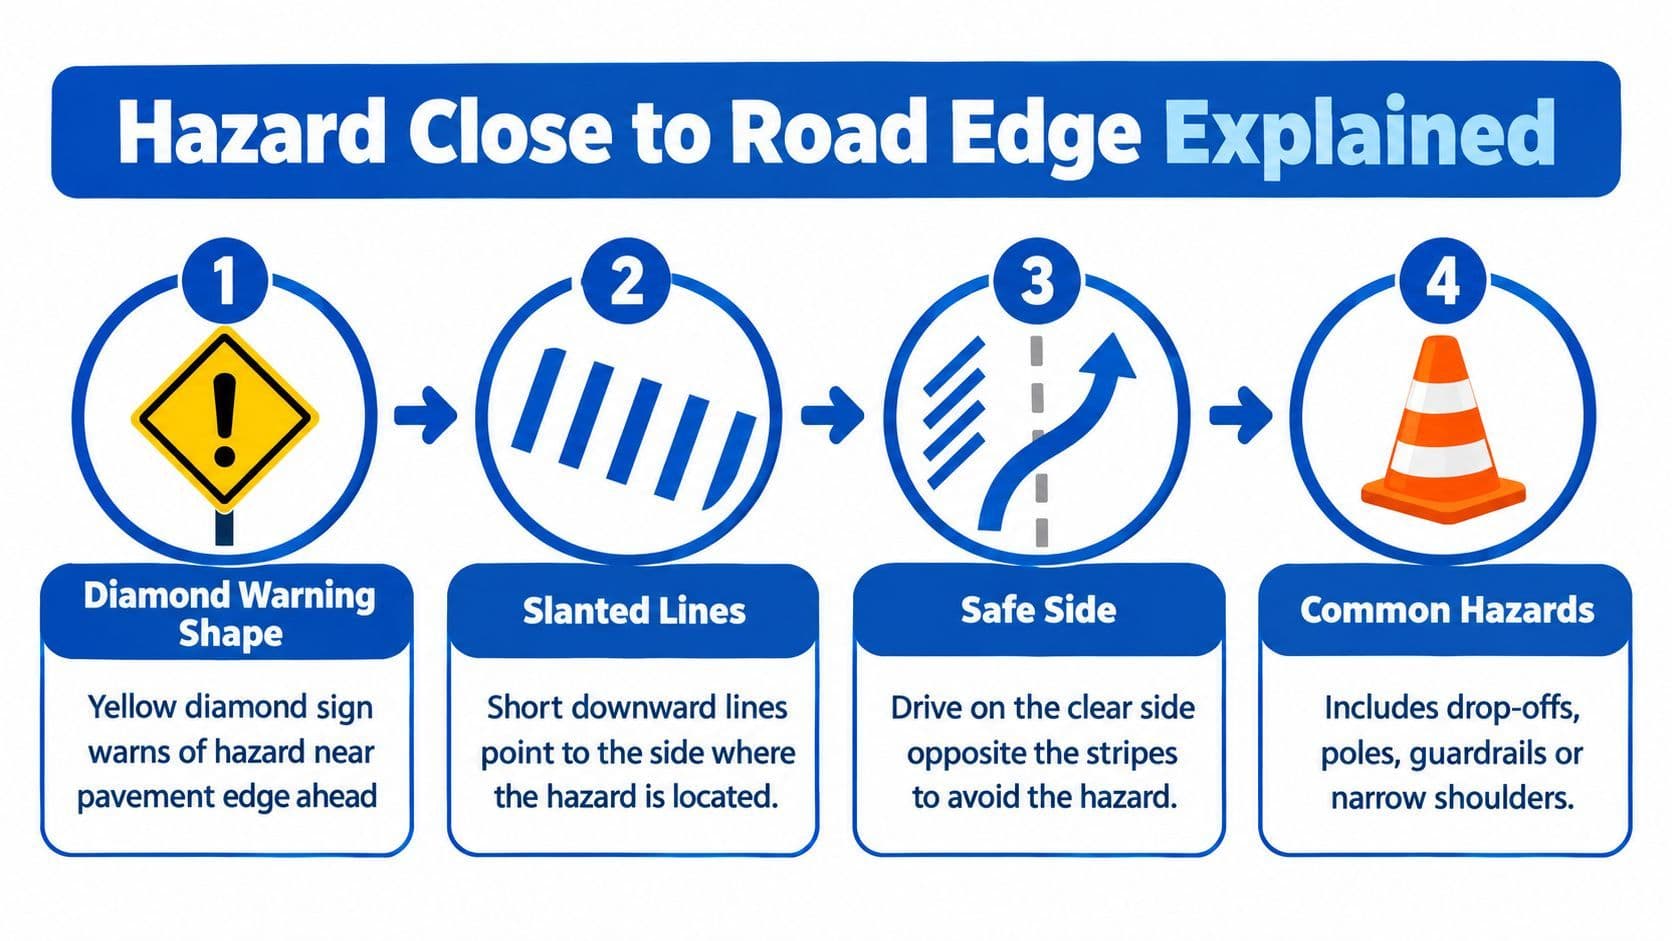
The hazard close to the edge of the road sign is a yellow diamond warning sign. Ontario warning signs alert drivers to conditions that may require extra attention, reduced speed, or a change in road position. The Ontario Driver's Handbook identifies this sign as “Hazard close to the edge of the road.” Its symbol uses short downward lines to show the side on which a driver may safely pass. You can review it with other Ontario warning signs in this Ontario information signs guide.
Start with the sign's basic appearance:
- Yellow background: This identifies a warning rather than a regulatory instruction.
- Diamond shape: Ontario uses the diamond shape for warning signs.
- Downward-sloping lines: These show the side where the hazard is located.
- Clear side of the roadway: You pass on the opposite side, where there's more usable pavement.
The most important point is that the lines don't mark the safe side directly. They point to the hazardous side. If the lines descend toward the left, the obstruction or edge danger is on the left, so you keep away from the left edge and use the clear right side. If they descend toward the right, the hazard is on the right, so you protect your right-side clearance and pass to the left when the road layout permits.
Don't confuse warning with regulation
This sign isn't a no-passing sign, a lane-use sign, or a command to cross the centre line. It warns you that the usable roadway may be affected near one edge. You still have to obey lane markings, oncoming traffic rules, speed limits, and any other sign or signal present.
The Ontario handbook's wording matters because the hazard might not be directly in your lane. It could be a shoulder transition, a narrow section, a drop-off, or an obstruction beside the pavement. The sign prepares you to choose a safer lane position before you reach it.
A simple way to remember it
Use this sequence:
- Find the downward lines.
- Identify the side toward which they point.
- Treat that side as the hazard side.
- Keep to the opposite clear side without sudden steering.
The sign's message is therefore two-part: a hazard is near one road edge, and the lines show where it is. The safe response is to create space from that edge while continuing to drive predictably.
Typical Edge-of-Road Hazards You Will Meet
The sign can refer to several conditions, not one specific object. On an Ontario concession road, the warning might precede a deep ditch. Near a rural driveway, it could mark a culvert head. After road work or heavy rain, the concern may be a soft shoulder or an abrupt break between asphalt and gravel.
Ontario's Ministry of Transportation defines the roadside broadly. It includes the area between the boundary or property lines, as well as medians, shoulders, and ditches. That means the roadside isn't only the strip of pavement beside your lane. It includes the recovery space where a vehicle may travel after leaving the travelled way.
Why small edge changes matter
A pavement edge drop-off can look minor from the driver's seat. One wheel may move from asphalt onto loose gravel, or encounter a sharp vertical difference between the paved surface and adjacent material. That change can deflect the wheel and make the vehicle harder to control, particularly for a learner who reacts by turning sharply.
Soft shoulders create a different problem. Rain can weaken the ground beside the pavement, while loose gravel can reduce tyre grip. A deep ditch or culvert gives the vehicle little forgiving space if it drifts off the travelled surface.
Ontario roadside guidance treats fixed objects inside the clear zone as areas of concern because striking them can increase crash severity. Examples include poles, ditches, culverts, and other roadside hazards. The preferred engineering response is to remove the object, relocate it, redesign it, use a breakaway design, shield it with a barrier or crash cushion, delineate it, and reduce speed only as the final option in that mitigation order. See the Ontario bicycle safety rules guide for another example of why edge awareness matters to vulnerable road users.
Hazard Where You See It Safe Position Soft shoulder Rural roads after rain or maintenance Stay on firm pavement and avoid the edge Deep ditch Concession roads and roads beside fields Maintain space from the ditch side Culvert head Driveway entrances and drainage crossings Slow early and pass on the clear side Loose gravel Unpaved shoulders and roadwork areas Keep a steady line, avoid sudden steering Pavement drop-off Where asphalt meets a lower gravel surface Stay inside the marked travelled pavement
Edge lines also help drivers understand where the travelled pavement ends. Ontario traffic manuals explain that markings on gravel or partially paved shoulders improve lane delineation and can reduce collisions, particularly when visibility is poor. A hazard becomes harder to manage when the pavement boundary disappears in darkness, rain, snow, or glare.
The sign isn't predicting one particular object. It's warning you that the road edge deserves extra clearance and careful control.
How to Respond Safely on the Road
When the sign comes into view, prepare before you reach the hazard. Your goal isn't to make a dramatic manoeuvre. It's to reduce the chance that a tyre, wheel, or sudden correction will carry the vehicle into the dangerous roadside area.
Use a controlled sequence
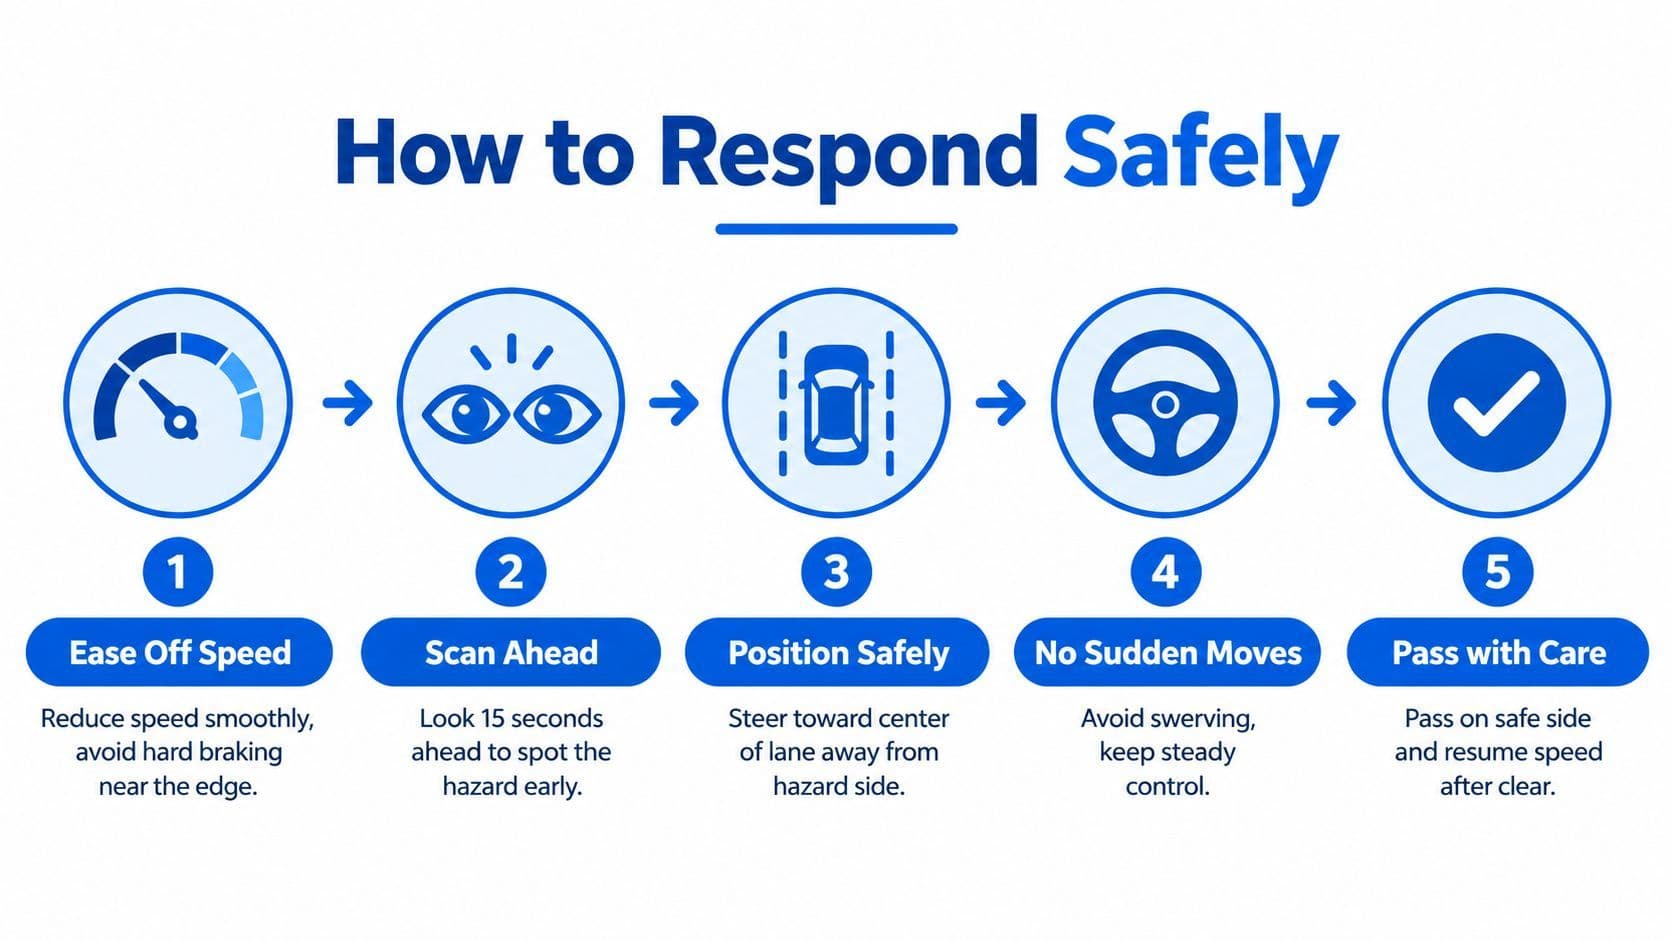
Ease off the accelerator first. Let the vehicle's speed reduce smoothly. Avoid a hard brake application beside a drop-off or soft shoulder because abrupt braking can upset the vehicle and leave less time for a calm steering response.
Scan well ahead. Look toward the road section beyond the sign, not just at the sign itself. Search for a ditch, culvert, broken pavement, gravel, cyclists, parked vehicles, or a narrowing shoulder. The farther ahead you identify the actual condition, the more time you have to make a small adjustment.
Choose a stable lane position. Keep the vehicle away from the hazard side while remaining fully within your lane. Don't hug the painted edge line, but don't drift into opposing traffic either. The clear-zone principle exists partly because a driver may need recovery room after an unplanned departure, so preserving space is safer than using every centimetre of pavement.
Keep your steering smooth. Both hands should remain on the wheel. A roadside object can make you tense, but staring at it and making a sharp turn often creates a larger problem. Look through the safe path, maintain a predictable heading, and correct gradually.
Check before changing position. If the road requires you to move around an obstruction, use your mirrors, check the appropriate blind spot, signal when necessary, and confirm that the path is clear. The mirror, shoulder check, and signal guide can help you practise the sequence.
Make the adjustment early
Don't wait until the front wheel is beside the ditch or culvert. By then, a sudden movement may be your only perceived option. Make a modest speed and position adjustment while the road is still open, then return to your normal speed only after the hazard and any related traffic have been cleared.
If the indicated safe side would require crossing a solid line or entering oncoming traffic, you don't automatically move there. Obey the markings and traffic conditions. The sign gives a warning about the edge, while your full driving environment determines whether any lateral movement is legal and safe.
Practical rule: adjust speed and position before the hazard, not on top of it.
How This Appears on the G1 Test
The G1 test usually turns the sign into a short recognition question. A typical question may ask:
“A hazard close to the edge of the road sign means you may pass on which side?”
The image supplies the answer. Find the short downward lines and note which side they point toward. That is the hazard side. Choose the opposite clear side, provided the road markings and traffic conditions allow it.
A question could offer choices such as:
- The side indicated by the downward lines
- The opposite side, away from the downward lines
- Either side, because the sign only recommends caution
- The centre of the road at increased speed
The correct answer is the opposite side, away from the hazard indicated by the lines. The first choice fails because the lines identify where the hazard is, not where you should drive. The third fails because the sign gives a directional warning, so both sides aren't equivalent. The fourth combines two unsafe ideas, speeding and moving toward the centre without regard for traffic.
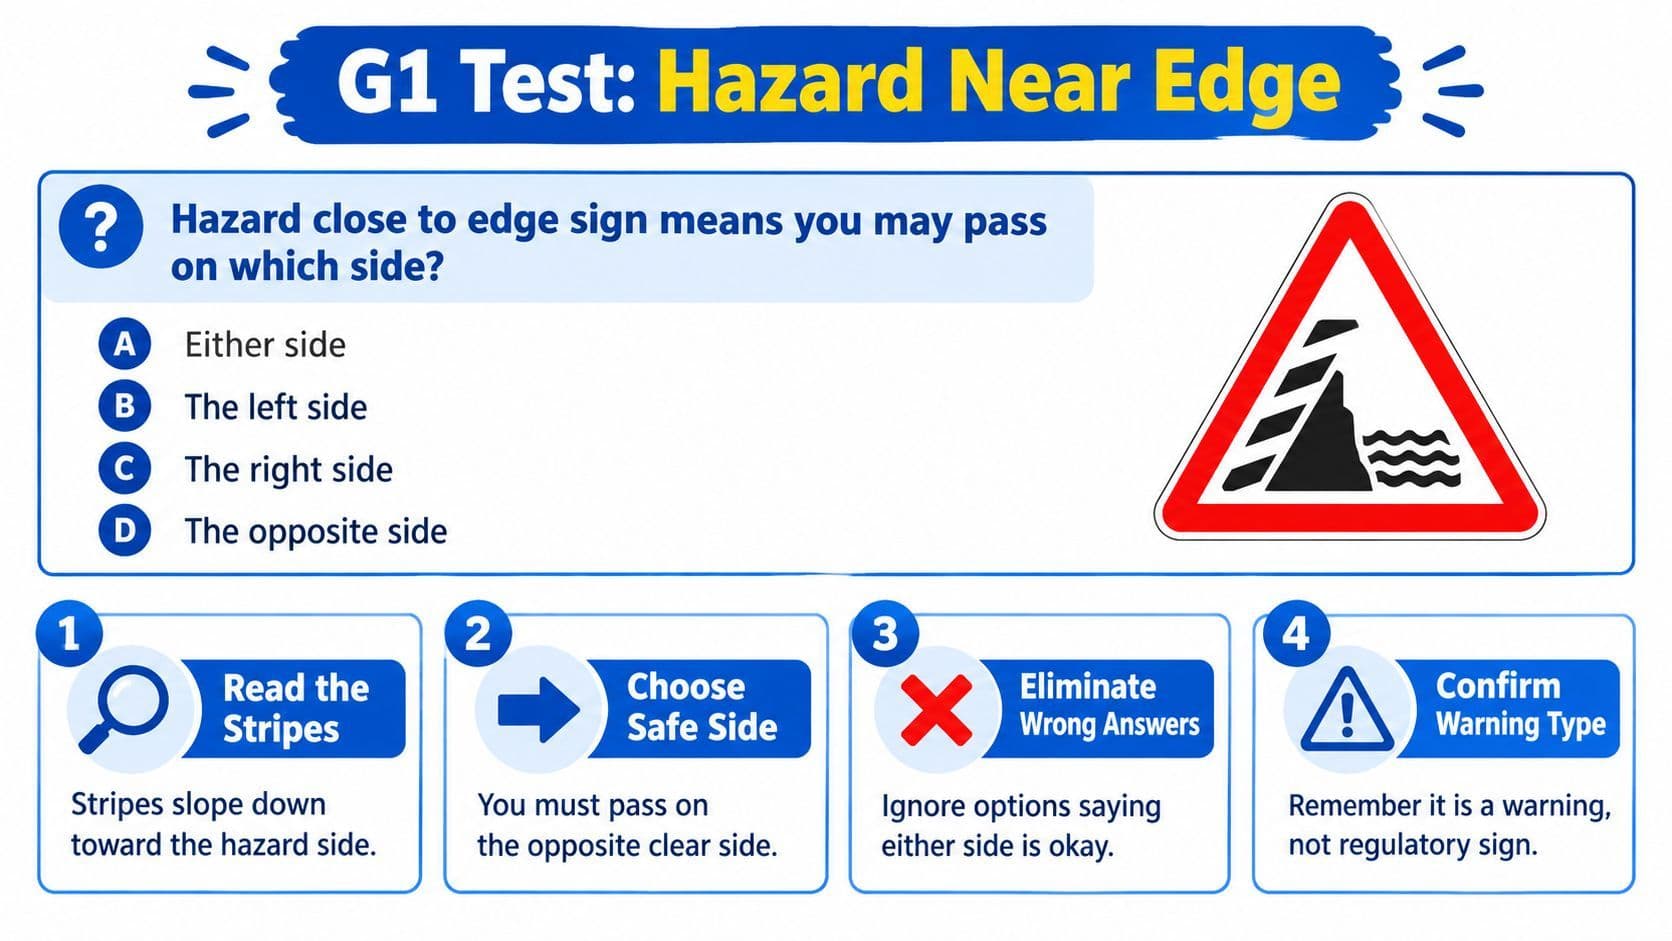
Apply a quick elimination method
Use this mental process:
- Read the question carefully. Look for “which side,” “hazard,” or “pass.”
- Locate the lines. Don't rely on the sign's tilt or the position of the signpost.
- Name the hazard side. The lines point toward it.
- Select the opposite side. Reject answers that say either side, speed up, swerve, or ignore traffic.
- Check the sign category. A yellow diamond is a warning sign, not a regulatory command.
The test isn't asking you to invent an emergency manoeuvre. It's testing whether you understand the handbook's precise visual message. If you can explain the sign in one sentence, you're less likely to be distracted by a poorly worded option.
The exam shortcut: lines toward the hazard, vehicle toward the clear side.
Common Mistakes and Better Choices
Many learners know that the sign signals danger but still choose the wrong action. They remember “hazard” and forget that the symbol provides a passing direction. The most reliable correction is to connect the visual cue to a calm driving response.
Slamming the brakes
Hard braking beside a drop-off can make the vehicle feel unstable and reduce your options. A learner may brake because the ditch looks close, but the sudden weight transfer can make it harder to hold a smooth line.
Better choice: ease off the accelerator early and brake progressively if the conditions require it. You'll have more time to assess the shoulder, the traffic behind you, and the safe path.
Swerving across the centre line
A sharp move toward the centre line can create a collision with oncoming traffic. It also treats the hazard as if it must be avoided instantly, even though the warning sign is meant to give you preparation time.
Better choice: make a small adjustment away from the hazardous edge while staying in your lane. Only change lanes or move around an obstruction when the road markings, visibility, and traffic make that manoeuvre legal and safe.
Passing on the wrong side
Some candidates assume the lines point to the side they should use. That reverses the sign's meaning. The lines identify the edge where the hazard sits, so choosing that side brings the vehicle closer to the danger.
Better choice: trace the lines visually, name that side as unsafe, then choose the opposite clear side.
Staring at the ditch
Your vehicle tends to follow your visual focus. If you fix your eyes on the ditch, you may steer toward it or miss a cyclist, parked vehicle, curve, or oncoming car.
Better choice: use eyes-up driving. Check the road section ahead, glance at the edge for information, and then return your focus to the safe path and surrounding traffic.
Treating every edge as identical
A gravel shoulder, a deep ditch, a culvert, and a roadside pole don't create the same physical risk. The sign gives you a warning, but your speed and lane position should reflect what you see.
Better choice: identify the condition early and respond proportionately. Slow down, preserve clearance, and avoid making the hazard worse through overcorrection.
Pulling It All Together for Test Day
The sign becomes much easier once you reduce it to three actions. The downward lines point to the unsafe side. Slow down smoothly rather than braking hard. Stay centred in your lane unless the road and traffic require a legal, controlled shift.
Ontario's roadside design guidance explains why this matters beyond the written test. On high-speed roadways with a traversable, flat, obstacle-free shoulder area, about 80% of vehicles that leave the travelled way are expected to recover or stop before travelling more than 9.1 m (30 ft) beyond the edge, while about 20% go farther. This benchmark, included in Ontario roadside design guidance, shows why fixed objects and steep conditions near the road edge receive serious attention. Ontario's roadside design guidance also records 221,793 reportable collisions in 2019, including 545 fatal collisions that killed 584 people, providing historical context for careful roadside design.
Your morning-of-test checklist
Before you begin the G1 test, run through this short mental routine:
- Confirm the shape: yellow diamond means warning.
- Identify the lines: determine which side they slope toward.
- Name the hazard side: that's the side to avoid.
- Choose the clear side: select the answer describing passage away from the lines.
- Recall the road response: reduce speed gradually, keep control, and don't swerve suddenly.
- Ignore dramatic distractors: speeding, stopping without reason, and crossing into danger don't match the sign.
The same reasoning helps when a roadside drop-off appears without a warning sign. Protect your clearance first, then look ahead to understand what caused the lane to narrow. A calm driver reads the full road, not just the most frightening object at its edge.
Practise the sign until the answer feels automatic: the lines point toward the hazard, and you pass on the clear side. That single visual rule can prevent the most common G1 mistake while giving you a sound response for rural roads, narrow shoulders, and changing pavement edges.
Use G1ready.ca to practise Ontario road-sign questions, including targeted quizzes and mixed G1 tests with immediate explanations. Focus on the hazard close to the edge of the road sign until you can identify the hazard side and choose the safe side without hesitation.


