
You're driving along a quiet Ontario side street when you realise you've passed the house, school, or driveway you needed. The road is narrow, a U-turn won't fit comfortably, and reversing into a private driveway isn't appropriate. A three-point turn in Ontario may help here, but only if the road gives you enough space, visibility, and time to complete it safely.
The manoeuvre isn't a trick to recite under pressure. It's a judgment exercise. You need to decide whether the location is suitable, communicate clearly with signals, check mirrors and blind spots, control the vehicle at very low speed, and know how to pause or recover if the first swing doesn't go perfectly. Ontario's official handbook treats the three-point turn as a formal driving skill, and the provincial online edition was updated in 2026 in the official MTO Driver's Handbook.
Why the Three Point Turn Matters on Ontario Roads
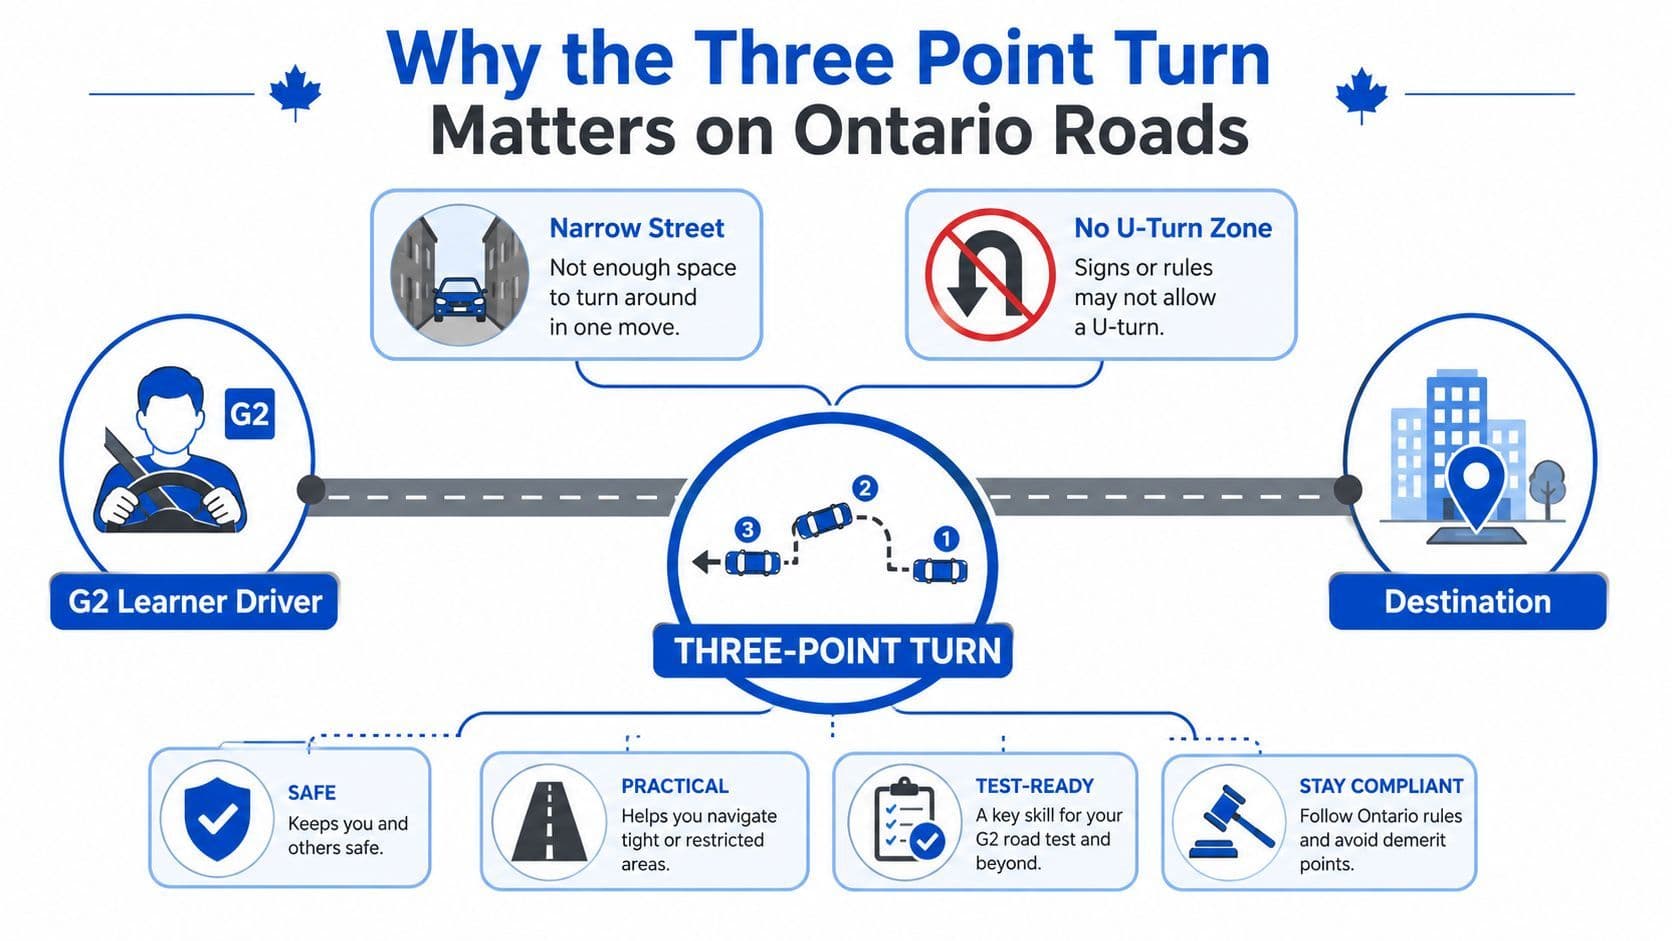
You miss the driveway on a quiet residential street. The road is too narrow for a comfortable U-turn, and using a private driveway would create another problem. A three-point turn in Ontario can put you back on course, but only when the location gives you time, visibility, and room to make a safe decision.
That judgment matters on real roads and during the G2 test. The manoeuvre shows whether you can select a suitable place instead of treating every narrow street as an invitation to turn. If parked vehicles hide the sightline, traffic is approaching, or the road leaves little recovery space, continuing to a safer location may be the better driving choice.
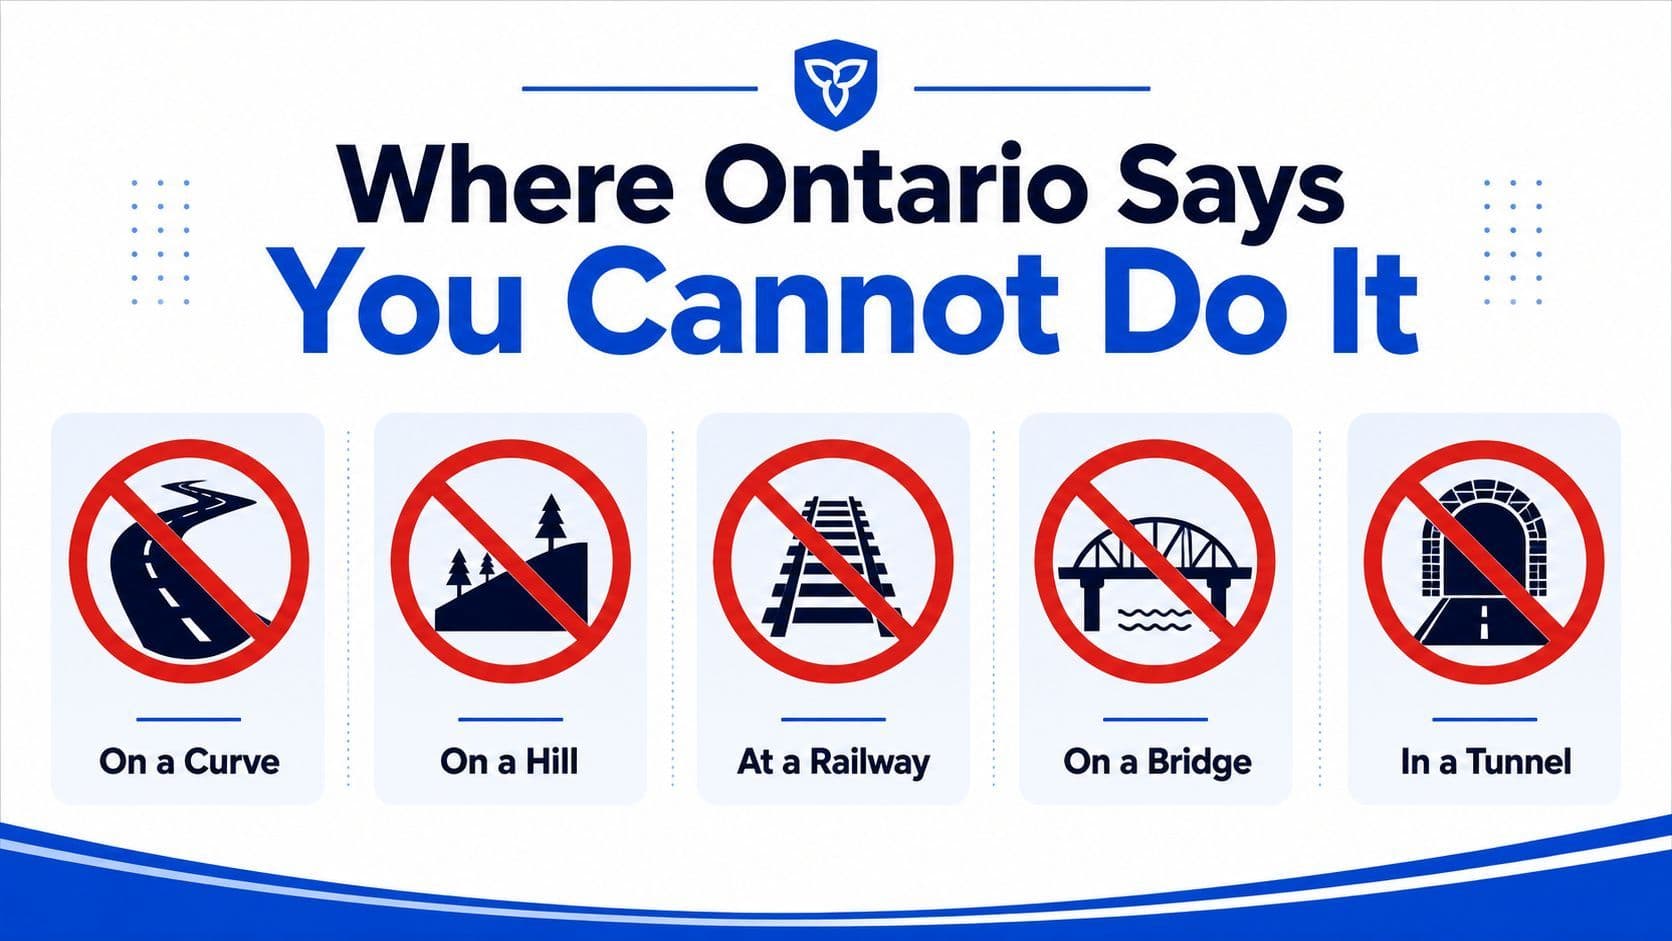
Ontario's handbook presents the three-point turn as a way to change direction on a narrow road. It also identifies locations where blocked visibility makes the manoeuvre unsuitable, including curves, railway crossings, hilltops, bridges, and tunnels under the province's changing-directions guidance.
The test skill is bigger than the turn
The three-point turn appears in Ontario's Level Two road-test context as a reversing-and-turning manoeuvre. An examiner can therefore assess more than steering direction. The test reveals how you read the setting, communicate your intentions, control the vehicle, and respond if the first swing leaves you short of the intended path.
A botched first swing does not automatically require a restart. Stop safely, reassess the space, and continue only if the vehicle and surrounding traffic remain under control. If the location has become unsafe, abandon the turn and choose another legal option.
In R. v. Robinson, the court noted that a three-point turn is “not specifically defined” in Ontario's Highway Traffic Act, while describing the familiar forward-backward-forward method of turning in a narrow space in the 2017 Ontario Court of Justice decision. Its testing and instructional role still gives learners a clear standard to practise.
Instructor's rule: Treat the three-point turn like a doorway, not a destination. Use it when the opening is clear. If the road makes you feel rushed, hidden, or boxed in, keep driving and choose a safer legal turn.
Getting Set Before You Turn the Wheel
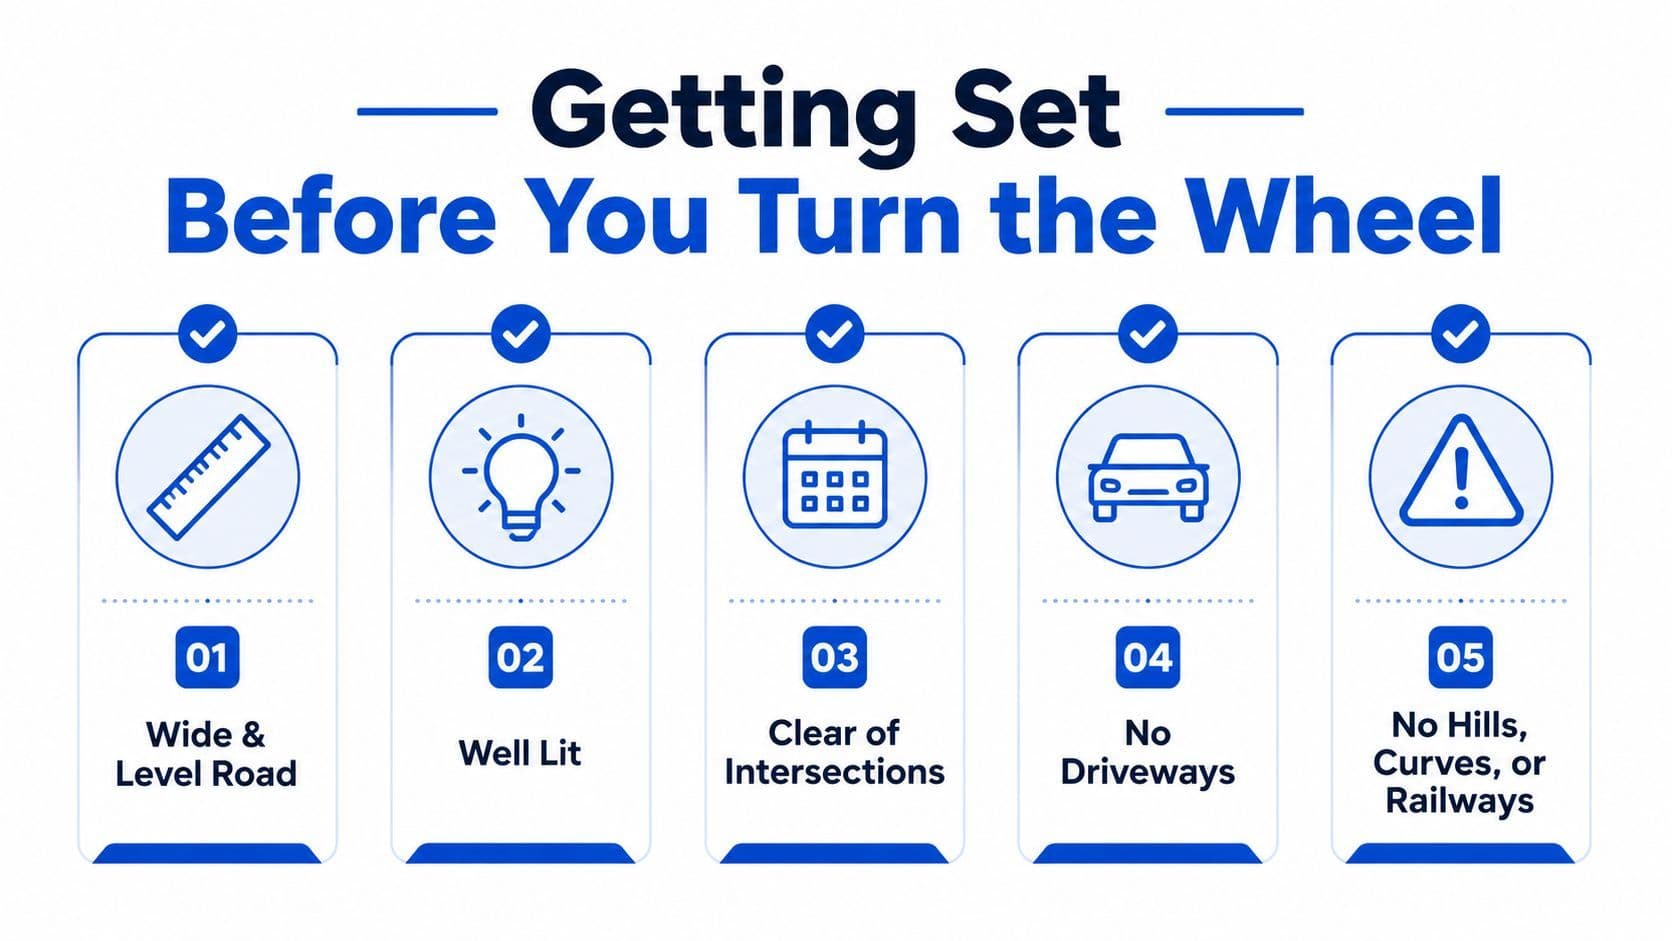
Preparation determines how much room you'll have once the wheels start moving. Choose a level, well-lit stretch with clear sightlines in both directions. Avoid intersections, driveways, hills, curves, railway crossings, bridges, tunnels, parked vehicles, pedestrians, cyclists, and heavy traffic. If a gap closes while you're preparing, wait. If the road no longer provides enough space, abandon the attempt.
Start by checking the interior mirror, signal right, and complete a right shoulder check before moving toward the curb. Stop parallel to the curb, with the vehicle no more than 30 centimetres away. That curb-position benchmark appears in Ontario's Level Two road-test guidance, which also says to stop as far as possible off the travelled portion when there's no curb in the official road-test handbook.
Make the vehicle predictable
Once stopped, keep the brake firmly applied. Use the parking brake if the vehicle or test conditions require it, then select reverse and observe around the vehicle again. Look over your shoulders, not only into the mirrors. A mirror can show part of the road, but it can't replace a direct check of the area behind and beside the vehicle.
Before the first forward movement, signal left and check the left blind spot. Your signal should communicate what you intend to do before the vehicle begins to move, not appear at the same moment as the steering input. A pedestrian, cyclist, or driver approaching from either direction needs a clear opportunity to understand your plan.
Keep your hands positioned for controlled steering and don't rush because someone is waiting behind you. A following driver's impatience doesn't make the space safer. For a refresher on hand placement and steering control, review this guide to steering-wheel grip.
The Forward, Reverse, and Forward Motion
Each movement has a different job. The first forward swing moves the front of the vehicle across the road, the reverse swing creates turning space, and the final forward movement places the vehicle in the new direction. Treat the turn like guiding a long object through a narrow opening. Steering timing matters because the front and rear of the vehicle do not follow the same path.
Begin the first forward movement with the wheels turned sharply left. Move slowly and watch the vehicle's position, not just the steering wheel. Stop when the front of the vehicle has reached a safe position near the opposite side, while leaving room for the rear to move during the next part. The exact stopping point depends on the road width and vehicle size. Stopping early gives you room to correct.
Shift to reverse only after the vehicle is fully stopped. Straighten the wheels before backing, then turn sharply right as the vehicle begins to move. The rear will travel toward the original curb while the front swings away from it. Keep the speed low enough to stop before the rear wheel reaches the curb. Curb contact shows that the turn was started too late, continued too far, or controlled too quickly.
A short pause between directions keeps the manoeuvre orderly. If the rear approaches the curb sooner than expected, stop, straighten the wheels, and use the remaining space rather than forcing the turn. One careful correction is safer than allowing the vehicle to climb the curb or enter another road user's path.
Reset between movements
With the vehicle stopped after reversing, straighten the wheels before selecting forward gear. The final forward movement begins with the wheels turned sharply left. Move toward the new lane, then unwind the steering as the vehicle becomes parallel with the road. This timing prevents the vehicle from finishing at an angle or drifting across the centre of the roadway.
The three movements should connect, but they should not blur together. Each gear change is a stopping point where you can settle the vehicle and confirm its position. A rushed transition often causes the driver to turn before the vehicle has stopped or to continue steering after the vehicle is aligned.
If the first swing is wide, a full restart is unnecessary. Stop while the vehicle remains controlled, straighten the wheels, and reassess the space. You may reposition with a small correction if the path remains clear. A botched first swing becomes dangerous only when the driver tries to rescue it without stopping or checking the vehicle's new position.
The visual sequence below connects steering timing with the three vehicle movements.
Where Ontario Says You Cannot Do It
An empty-looking street can still hide danger. Before turning, scan far enough in both directions to see approaching vehicles, cyclists, and pedestrians throughout the complete manoeuvre. If a bend, rise, structure, parked vehicles, or narrowing roadway interrupts that view, keep driving and find a clearer location.
The familiar restricted areas share one problem: they reduce your warning time and your room to recover. Curves and hilltops conceal road users. Railway crossings add rails, warning equipment, and limited space. Bridges and tunnels may narrow the roadway or block your view. Treat these features as signs to stop searching for a turning point, rather than as places to test your steering control.
Scan beyond the immediate space
Use a simple visibility test: from the intended turning position, could another road user appear before you finish reversing and move forward? If the answer is uncertain, do not commit. Check both directions again after stopping, because traffic that was distant can become a problem during the gear changes.
A divided highway is not a place to cross a median or improvise a turnaround. Follow the road layout and choose a lawful route. For related Ontario turning restrictions, review this guide to U-turn rules in Ontario.
When the Smart Move Is Not to Turn at All
The safest three-point turn is sometimes the decision you make before moving. Continuing to the next legal intersection may add time, but it avoids forcing a low-speed reversing manoeuvre into heavy traffic, poor visibility, wet or icy conditions, or a street that does not provide enough width.
Ask yourself three questions. Can I see far enough in both directions? Is there a long enough gap to complete the entire movement? Can I stop without making another road user brake or swerve? If any answer is uncertain, keep going.
A driveway or parking-lot entrance may offer a safer alternative when access is authorised and the exit is clear. Don't use a private driveway merely because it's convenient, and don't block an entrance while trying to turn around. A legal public option is preferable to taking possession of someone else's space.
Treat surrounding road users as part of the decision
Parked cars can reduce your turning room and hide a child, cyclist, or pedestrian. A vehicle following too closely can make the reverse phase uncomfortable or unsafe. School areas and busy pedestrian environments demand extra caution because people can enter your path while you're focused on steering.
On the G2 test, completing the manoeuvre isn't the priority. The examiner wants to see safe judgment, observation, signalling, and control. If your first swing goes wide, stop and reassess rather than rushing to finish. A controlled pause shows better driving than a perfect-looking sequence completed under pressure.
Mistakes That Fail a G2 Road Test
Small habits often make a three-point turn appear uncontrolled. The most visible problems are curb contact, missed signals, skipped shoulder checks, and poor vehicle positioning. Ontario-focused road-test guidance specifically identifies hitting or mounting the curb, inadequate shoulder checks during reversing, and missed signalling during the different phases as common failure triggers in this G2 three-point-turn guide.
Positioning errors
Stopping too far from the curb reduces the room available for the front end to swing. Stopping too close creates a different problem, because the wheels may climb or touch the curb during the reverse or forward movement. Use the Ontario benchmark of no more than 30 centimetres from the curb, then correct your position before beginning the turn according to the province's Level Two road-test guidance.
Wheels should be straight before each change of direction. If you shift from reverse to forward while the wheels remain angled the wrong way, the vehicle can move across the road more sharply than expected. Stop fully, straighten, select the next gear, and observe again.
Observation and communication errors
A mirror-only check isn't enough during reversing. Turn your head and look over the appropriate shoulder before and while the vehicle moves backward. Check the opposite side as well, because a person or vehicle can enter from outside the immediate rear view.
Signals should remain clear through each phase. Signal left before the forward movement, signal right before reversing, and signal left again before completing the final forward movement as stated in the official Ontario handbook. A quick tap immediately before steering may not give other road users enough time to understand your intention.
Recovery errors
A poor first swing doesn't require panic. Stop, apply the brake, complete a new observation, and correct only if the road remains clear. Don't mount the curb, swing into another lane, or continue moving only because stopping feels embarrassing.
Road-test habit: A visible pause followed by a complete shoulder check is a strength, not a weakness, when the vehicle's position needs correction.
A Practice Plan That Sticks
Practice should build judgment as well as steering memory. Choose a quiet, lawful street with clear sightlines and enough room to set up two traffic cones or plastic bottles about 7.5 metres apart. Keep the practice area away from moving traffic, driveways, pedestrians, and other hazards, and confirm that the road is suitable before every session.
Work through the manoeuvre slowly, but don't stare at the cones. They're reference points, not targets. Your eyes should move between the road, mirrors, blind spots, and the intended path of the vehicle. The aim is to learn how much space your specific car needs, where the front end travels during reverse, and when to stop before curb contact.
Use deliberate variations
Practise starting from the right curb, then vary the setup when it's safe and lawful so you don't depend on one rigid visual pattern. Practise stopping, changing gear, signalling, and checking again at every transition. If the road becomes busy, stop the drill. Real skill includes recognising when practice conditions have changed.
Residential routes in Mississauga, Brampton, and Ottawa can expose learners to different road layouts, including streets with parked vehicles, narrower lanes, and roads without a centre line. Don't treat a familiar neighbourhood as automatically safe. Visibility, traffic, weather, and available space still control the decision.
Keep a short practice record after each session. Note the time of day, traffic conditions, curb distance, and whether you made curb contact. That record helps identify whether the weakness is steering, observation, positioning, or choosing poor locations.
Rehearse the conditions, not just the pattern
Once basic control is reliable, practise in changing light and light rain only when conditions remain safe and visibility is adequate. Wet pavement can alter how the car feels and can make rushed inputs more difficult to manage. Never create a hazardous practice session just to imitate a test environment.
End with a short debrief. Ask yourself where the first observation happened, whether every signal was clear, whether you stopped before each direction change, and whether you would choose the same location in real traffic. Short, focused sessions usually create more useful learning than one tiring drive that leaves you repeating the same mistake.
For broader preparation that connects road rules with behind-the-wheel habits, use this Ontario driving practice guide.
G1ready.ca offers registration-free Ontario G1 practice exams, targeted quizzes, mixed tests, diagnostic practice, explanations, hints, and progress tracking that can reinforce the rules behind your road-test decisions. Visit G1ready.ca to review the relevant Ontario material, then practise the three-point turn with an instructor or supervising driver who can watch your observations and signalling.


