
You're sitting in the driveway, licence and test confirmation ready, but your mind is already racing through every possible mistake. Many candidates treat the road test as something that begins when the car pulls away from the curb. A reliable G driving test checklist starts earlier, with the vehicle checks you complete before the engine turns over, then follows the drive through lane changes, braking, intersections, parking, traffic rules, and hazard awareness. Use the sequence below as a rehearsal plan. Practise each step until you can perform it calmly in the same vehicle and traffic conditions you'll face on test day.
1. Master Vehicle Controls and Pre-Drive Inspection
Your first task is proving that you can operate the vehicle safely before moving. Locate the steering wheel, accelerator, brake pedal, gear selector, parking brake, wipers, headlights, turn signals, and emergency flashers without searching or looking down for too long. Adjust the seat and steering wheel so you can reach the pedals comfortably, then set the mirrors to give you a clear view around the vehicle.
The vehicle must also be fit, properly working, plated, and insured for the road test. Check the brake lights, signals, horn, mirrors, tires, windshield visibility, seat belts, parking brake, fuel or charge level, permit, and insurance. Ontario's requirements make vehicle readiness an eligibility issue, not a cosmetic detail. A last-minute defect can stop a prepared driver from beginning the appointment. Review the Ontario G road-test requirements before you leave home.
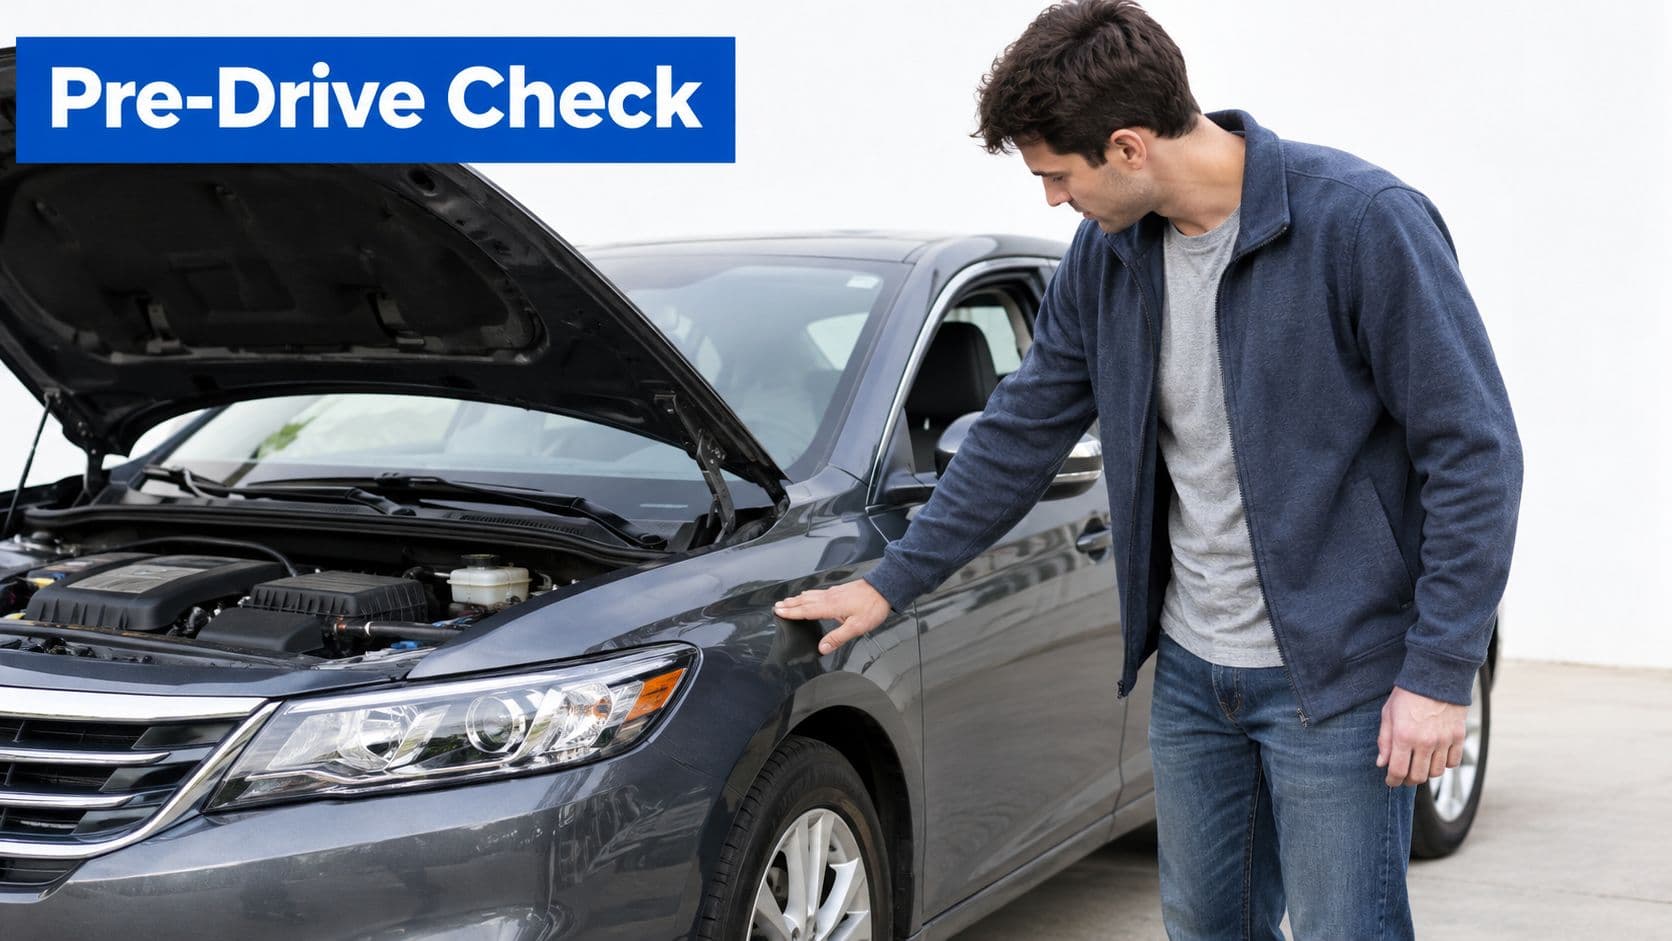
Rehearse the same inspection every time
A teen borrowing a family vehicle should repeat the same seat, mirror, belt, and control routine on every drive. A newcomer should also learn the warning symbols on the exact dashboard they'll use, including indicators for oil pressure, coolant temperature, and battery charge.
Use this home drill:
- Walk around the vehicle: Confirm that the tires, lights, plates, and exterior panels look ready.
- Set the driving position: Adjust the seat, steering wheel, mirrors, and seat belt before selecting a gear.
- Name each control: Point to the control and explain its purpose without guessing.
- Practise hand placement: Review a safe steering wheel grip while keeping your view ahead.
Practical rule: Speak clearly while checking the vehicle. The examiner needs to see deliberate preparation, not hurried movements.
2. Execute Smooth Lane Changes and Merging Maneuvers
A safe lane change has a visible sequence. Check the rear-view and side mirrors, signal your intention, check the blind spot with a shoulder glance, and move smoothly when the space is clear. Keep your speed steady instead of braking sharply as you enter the next lane. The examiner is watching whether you understand the traffic around you, not whether you can move across a lane quickly.
Merging requires the same awareness with more speed and traffic pressure. Use the available acceleration space, match the traffic flow when conditions allow, and choose a gap that lets you join without forcing another driver to brake. A nervous candidate often waits so long that the merge becomes abrupt. A rushed candidate signals late, cuts across the lane, or drifts while looking over their shoulder. Neither approach demonstrates reliable control.
Practise on multi-lane roads under manageable conditions, then increase the variety of traffic and road layouts. Don't limit preparation to a quiet parking lot. The mirror, shoulder-check, and signal routine has to work while you're processing signs, speed, following distance, and nearby vehicles.
Use one repeatable drill
Ask an accompanying driver to give you a sequence of lane-change instructions without coaching the movement itself. Each time, complete the following:
- Observe: Check the rear-view and side mirrors.
- Communicate: Signal early enough for surrounding drivers to understand your plan.
- Confirm: Look over your shoulder into the blind spot.
- Move: Steer gradually into the centre of the lane.
- Stabilize: Cancel the signal and recheck your mirrors.
A driver who practises five consecutive clean lane changes can focus on consistency rather than one successful attempt. Don't change lanes just to demonstrate activity on test day. If your lane is safe and the examiner hasn't asked for a move, maintain position.
3. Demonstrate Proper Braking and Emergency Stop Control
The examiner watches your braking before the vehicle reaches a stop. Ease off the accelerator early, apply the brake progressively, and stop behind the required line or before the crosswalk. Keep the vehicle straight. A controlled stop shows planning, while a late, heavy pedal application suggests that you noticed the stopping point too late.
Your approach should change when the examiner requests an emergency stop. Respond promptly with firm brake pressure, keep both hands controlling the steering, and stop without skidding. The goal is a quick, controlled response, not a dramatic manoeuvre. Practise only in a legal, clear area, such as an approved driving-school site or an empty lot with the owner's permission. Keep pedestrians, parked vehicles, and ordinary traffic away from the exercise.
Calibrate your braking before the test
The same pedal pressure can feel different in a compact car and a family SUV. Wet pavement and loose gravel also reduce available grip, so build your practice around feel rather than a memorised stopping measurement. Learn the pressure that produces a gentle stop, then the firmer pressure needed for an urgent one.
Use a qualified accompanying driver and run this sequence:
- Make several normal stops, adjusting pressure so the vehicle slows smoothly.
- Begin braking earlier near crossings, intersections, and parked vehicles.
- In a clear, permitted area, brake firmly when your partner gives the command.
- After each attempt, check whether you stopped promptly while keeping steering control and avoiding wheel lock or sliding.
A useful home drill is to call out “brake point” before each planned stop, then compare that point with the vehicle's actual response. This builds early decision-making without turning every stop into an emergency exercise.
Keep your foot close to the brake when a stopping situation may develop. On test day, calm early braking demonstrates better control than trying to prove fast reactions with a panic stop.
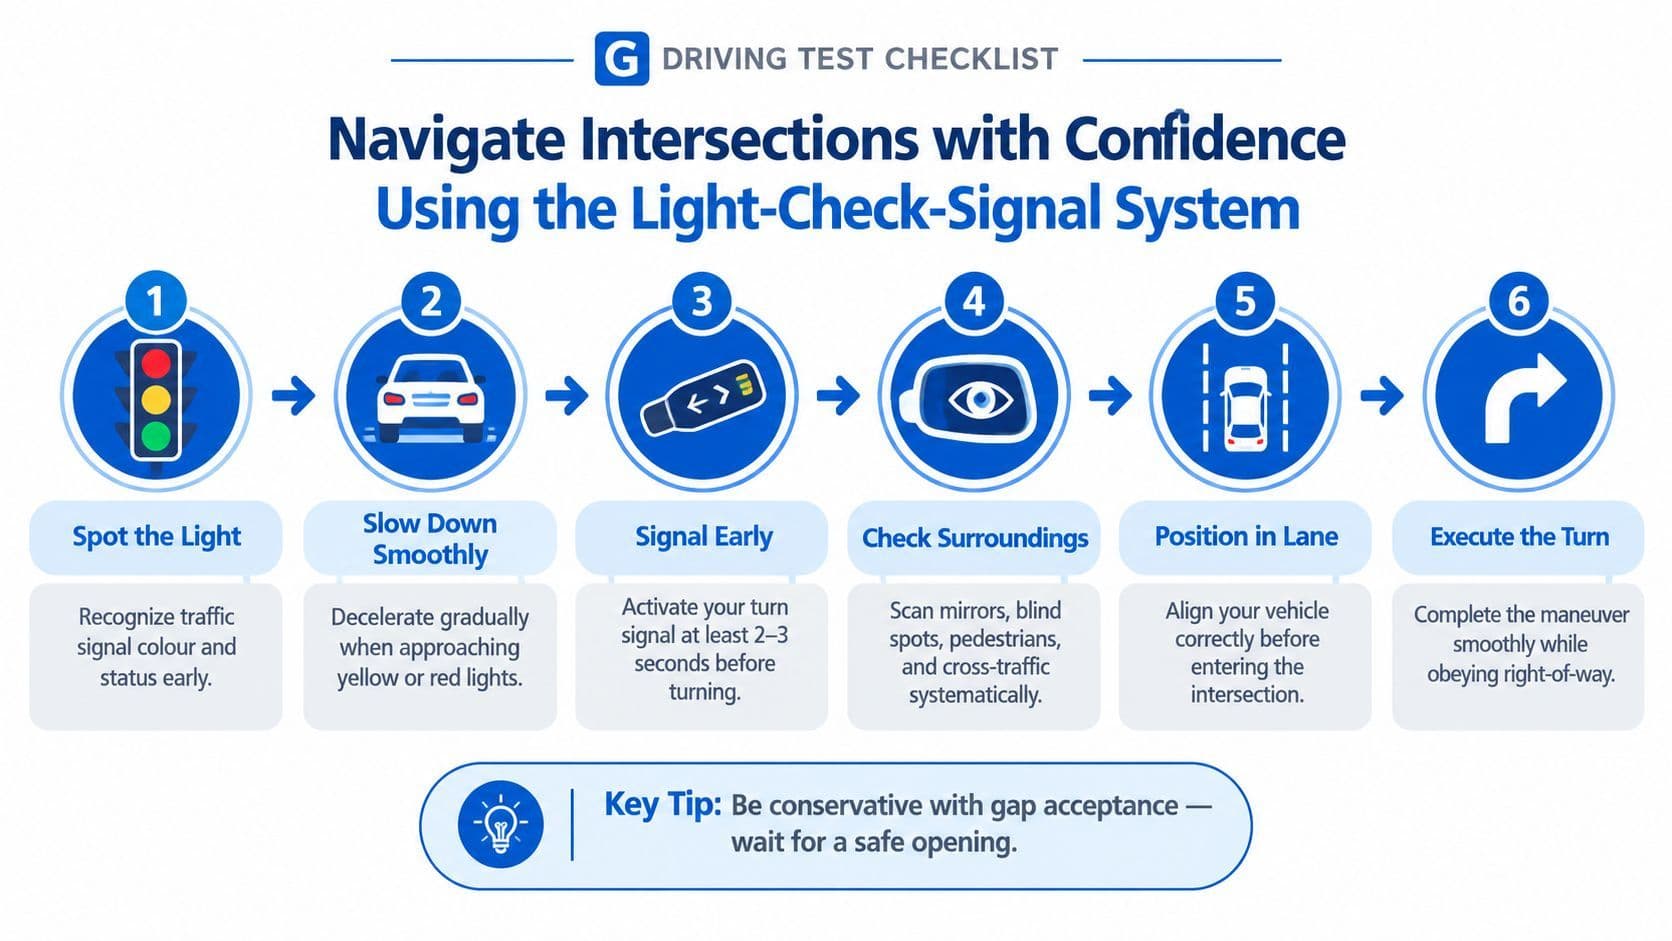
4. Handle Intersections with Confidence Using the Light-Check-Signal System
The examiner sees your decision-making clearly at intersections. Reduce speed, identify the traffic light or sign, scan the crosswalk and side streets, then consider what other road users may do. At a stop sign, stop completely at the correct position before checking the intersection. At an uncontrolled intersection, slow enough to confirm priority and make sure the path is clear.
Use the sequence every time: Light or sign, crossing area, lane position, gap, exit scan. On approach, identify the control and watch for pedestrians, cyclists, or vehicles entering your path. Before turning, confirm the lane you should finish in. Wait for a safe opening, then recheck mirrors and surroundings after the turn.
Turning starts before the wheels move. Signal in good time, check mirrors and the blind spot where appropriate, and select the correct lane. Keep the turn controlled. Avoid cutting the corner or swinging wide. For a left turn, wait while judging oncoming traffic, pedestrians, cyclists, and the available space beyond the intersection.
Rehearse the sequence in order
Choose a familiar intersection and repeat the process during practice drives. Then apply it at an unfamiliar location. Say, “The light is changing, I'm slowing,” or, “There's a pedestrian near the crossing.” Speaking aloud shows whether you noticed the hazard early or reacted only after it became obvious.
Your home drill is simple. Have your accompanying driver call out an upcoming intersection. You identify the control, crossing area, finishing lane, and safe gap before turning. If the chance to turn disappears, continue safely and follow the next instruction. A missed turn is easier to correct than an abrupt lane crossing.
5. Execute Parallel Parking and Reverse Maneuvers Correctly
The examiner watches how you manage space when the vehicle is moving slowly. For parallel parking, set up beside the opening, check around the vehicle, signal, and reverse at a controlled pace. Steer through the space rather than chasing one reference point. Mirrors show useful angles, but shoulder checks and direct observation still matter.
Keep the manoeuvre deliberate. If your position becomes poor, stop, reassess, and correct when permitted. Forcing the turn can bring you close to the curb or another vehicle. A calm reset usually shows better control than a rushed recovery.
Reverse parking and straight-line reversing require the same discipline. Scan for pedestrians, vehicles, and the curb before moving and during every change of direction. Practise with cones in a permitted lot, then vary the opening so you can handle spaces that are wider or tighter. Reference points help you repeat the manoeuvre, but they should support observation rather than replace it.
Use this home drill: begin from different positions beside the cones, complete the manoeuvre, then stop and explain what you saw. Your accompanying driver can record whether you checked mirrors, signalled, shoulder-checked where appropriate, controlled your speed, and finished safely.
Practise these checkpoints:
- Starting position: Leave enough room to reverse and steer safely.
- Observation: Scan before moving and throughout each direction change.
- Steering control: Turn smoothly, then straighten once aligned.
- Final position: Finish safely without touching the curb or nearby vehicles.
- Recovery: Stop and reset when the approach is clearly wrong and the examiner allows it.
The current full G test focuses on major roads and expressways. Ontario says that, until further notice, parallel parking, roadside stops, three-point turns, and residential neighbourhood driving are not included because those skills are covered at G2. They remain useful practice for broader driving development and for candidates preparing for the earlier road test. Review the sequence in this parallel-parking demonstration.
6. Study and Internalize Ontario Traffic Laws and Road Signs
A correct answer on the G1 knowledge test matters only if it changes your driving. Study the official Ontario Driver's Handbook, then connect each rule to a situation you may face. Learn regulatory, warning, and information signs, right-of-way rules, traffic controls, complete-stop requirements, and adjustments for pedestrians, cyclists, weather, and visibility.
Use a simple sequence during supervised drives: identify the sign or marking, state the rule, then act on it. For example, say what a yield sign requires before you reach it. At a stop sign, identify the stopping line and stop completely before deciding when to proceed. This exposes the gap between recalling a definition and applying it at the right speed and position.
A newcomer comparing Ontario rules with those from another country should record unfamiliar signs and priority situations. A parent can ask a teen to explain the next sign or identify who proceeds first, while keeping the exchange brief enough to protect attention.
Build each review around these prompts:
- Traffic signs: Name the meaning and required response before passing.
- Road markings: Identify lane boundaries, turn lanes, stopping lines, and passing restrictions.
- Right-of-way: Decide who proceeds before the situation becomes urgent.
- Pedestrian rules: Check crossings and sidewalks before turning or continuing.
- Speed control: Follow the posted limit and reduce speed when conditions require it.
After a mistake, locate the rule in the handbook instead of memorising a corrected answer. Apply that rule on the next supervised drive, then ask your accompanying driver whether your timing, position, and response matched it. Repeating this process turns law knowledge into a test-day habit.
7. Develop Hazard Recognition and Defensive Driving Habits
A parked car, driveway, or side street can change your test within seconds. The examiner watches whether you identify that risk early, check mirrors and blind spots, and adjust without upsetting the vehicle. Scan well ahead, sweep the sides, and keep checking what may enter your path.
Defensive driving gives you time and space. Leave a safe following distance, reduce speed on wet pavement or when visibility drops, and avoid accelerating into a developing conflict. The Ontario defensive driving course guide can support your preparation, while supervised driving teaches you to apply these habits on real roads.
Call out the hazard, then choose a response
During a supervised drive, ask your accompanying driver to remain quiet unless intervention is necessary. At intervals, name three hazards and state your response before they become urgent. For example: “That parked car could open a door, so I'm moving slightly away and holding my speed.” This shows earlier judgment than reacting after the door opens.
Practise the sequence below on different roads and in changing conditions:
- Scan ahead: Look beyond the vehicle directly in front of you.
- Check the sides: Watch driveways, parked vehicles, crossings, and cyclists.
- Create space: Increase your gap when traffic, weather, or visibility worsens.
- Act early: Slow down or adjust position before the hazard reaches you.
- Remain predictable: Avoid sudden braking, swerving, or unnecessary lane changes.
Your drill is simple: the driver names the hazard, states the risk, then makes one controlled adjustment. Review whether the timing, speed, and lane position gave you enough room.
Smooth defensive driving can look uneventful. That is the result the examiner wants to see. You noticed the risk early and responded without panic.
The provincial average G highway road-test pass rate was approximately 73%, while 2022 rates ranged from 57% in Brampton to 89% in Owen Sound, according to the Ontario Auditor General's driver-training report. Practise the common MTO skills, then spend time on the local roads and highway conditions used for your test. Rate each drive for observation, signalling, lane control, speed, right-of-way, parking, and expressway performance. Confidence helps, but consistent decisions show readiness.
7-Point Driving Test Checklist Comparison
Skill / Task 🔄 Implementation complexity ⚡ Resource & practice required 📊 Expected outcomes ⭐ Key advantages 💡 Tips / Ideal use cases Master Vehicle Controls and Pre-Drive Inspection Low–Medium, routine steps, vehicle-specific differences Low, one vehicle, short repeated practice Fewer mechanical/test-day issues; examiner sees safety awareness ⭐⭐⭐⭐, foundational safety and confidence Practice same-vehicle checklist; arrive 10–15 min early Execute Smooth Lane Changes and Merging Maneuvers High, coordinated mirror, shoulder, signal, steer actions Medium–High, needs multi-lane roads and moderate traffic Safer highway driving; heavily weighted on the test ⭐⭐⭐⭐, high transferability, improves test score Make mirror→signal→shoulder automatic; practise on moderate-traffic routes Demonstrate Proper Braking and Emergency Stop Control Medium, pedal modulation and calm response under pressure Medium, empty lot or driving school practice recommended Better crash avoidance; examiner confidence in control ⭐⭐⭐⭐⭐, essential for immediate hazard response Practice emergency stops in controlled area; learn brake “pressure point” Navigate Intersections with Light‑Check‑Signal System High, simultaneous scanning, speed control, and positioning Medium, practice varied intersections and turning scenarios Fewer intersection errors; stronger situational awareness ⭐⭐⭐⭐⭐, frequent test scenarios; reduces collision risk Verbalise observations during practice; be conservative with gap acceptance Study and Internalize Ontario Traffic Laws and Road Signs Medium, memorization with nuanced rules High, dedicated study time, flashcards, practice tests Legal compliance on test day; avoids rule‑based failures ⭐⭐⭐⭐⭐, foundational and lifelong applicability Read the G1 handbook multiple times; use practice question banks Develop Hazard Recognition and Defensive Driving Habits Medium–High, continuous mental scanning and anticipation Medium, varied-condition driving and instructor feedback Fewer emergencies; smoother, anticipatory driving behavior ⭐⭐⭐⭐⭐, large long‑term safety and insurance benefits Narrate hazards aloud; practise the 2–3 second following distance
Test Day Reminders and Your Next Study Step
Run through the sequence once more the day before: vehicle checks, mirrors and signals, braking, intersections, parking, traffic rules, and hazard scanning. Confirm that the vehicle is fit, plated, insured, and familiar to you. Bring the required licence and documents, and make sure the person accompanying you meets the applicable requirement.
If you're preparing for the G2 exit test, highway experience needs special attention. Before the test, applicants must complete and sign a Declaration of Highway Driving Experience. The declaration asks how often they drove on a freeway or highway with a speed limit of at least 80 km/h during the preceding three months, and asks them to classify the average trip as under 5 kilometres, 5 to 15 kilometres, or over 15 kilometres. If the examiner finds the experience insufficient, the test can be cancelled as out-of-order and 50% of the prepaid road-test fee can be forfeited. Record each highway session, including the route, date, road type, speed environment, and approximate distance, then practise merging, lane changes, following distance, speed control, scanning, entry, and exit.
Ontario's full Class G pathway is graduated. You start with G1, complete at least 12 months of supervised driving, and pass the Level One road test to receive G2 privileges. After holding G2 for at least another 12 months, you can attempt the G2 exit road test for full Class G privileges. The minimum complete timeline is 20 months, although an approved driver-education course can reduce the G1 waiting period. The minimum application age for G1, G2, and Class G licences is 16. Review the official Class G licensing pathway so your practice schedule matches your eligibility.
On test day, arrive with time to settle, adjust the vehicle, and repeat your inspection. If you make a small mistake, don't abandon the routine. Listen to the next instruction, regain your observation, and make the next safe decision. Because the written knowledge test comes before the road test, G1ready.ca offers free, registration-free practice exams aligned with the latest Ontario G1 handbook. Use targeted quizzes, mixed tests, diagnostic practice, and the exam simulator to strengthen the rules knowledge behind every driving skill in this checklist.
G1ready.ca offers free, registration-free Ontario G1 practice exams with immediate explanations, hints, progress tracking, and mobile-friendly access. Use it to review traffic signs and rules before you rehearse the vehicle and road-test sequence, then visit G1ready.ca to start practising.


