
You're probably reading this in one of two moods. Either you're studying for the G1 and the painted lines in the handbook all blur together, or you've sat in the passenger seat on a wet Ontario afternoon and realised that the lines on a road are easy to name when the pavement is dry, but much harder to trust when rain, slush, or glare starts hiding them.
That's exactly why line reading matters. A road line isn't decoration. It's a quiet instruction about where your car belongs, whether you may pass, where you must stop, and where a person on foot expects you to yield. When you understand those markings as a system instead of a list of trivia, both the written test and real driving get simpler.
Why the Lines on a Road Matter Before You Even Start the Car
You pull up to an intersection just after sunset in February. The road is wet, the headlights around you bounce glare off the pavement, and the paint ahead looks patchy from salt and snow wear. Before you check your speed or touch the gas, you need one thing to be clear. What the road is telling you.
For a new driver, road lines work like the floor markings in a busy parking garage. They show where your space starts, where it ends, and where crossing over creates a problem fast. Ontario treats pavement markings as part of the traffic-control system, used with signs and signals to guide where drivers may travel and how traffic should move, according to the official Ontario driver's handbook on pavement markings.
That matters before the car even rolls.
A line can answer the question you are about to face next. Can I change lanes here? Do I stop at this point or farther forward? Is this lane turning, ending, or continuing straight? On the G1 test, those questions show up as neat diagrams. On a real Ontario road, they show up faded, half-hidden by slush, or washed out by low winter sun. The rule stays the same even when the paint is harder to read.
That gap between the handbook picture and the street is where learners get stuck. A clean diagram makes every marking look obvious. An actual intersection does not. One line may be worn thin. Another may be buried under snow at the edge. A turn arrow may only appear clearly when you are already close. Reading lines early gives you time to match the pavement with the sign, the traffic around you, and the move you plan to make.
A simple example shows why. If the stop line sits a little back from the crosswalk, that is your stopping point, even if the brighter stripes ahead catch your eye first. If a centreline looks broken but the road curves over a hill and you cannot see far enough, passing is still a bad choice. The paint gives permission or restriction. Your job is to read it soon enough to act safely.
New drivers usually mix up the same few things:
- Colour and direction. Yellow and white do different jobs, and mixing them up changes how you read the road.
- Permission and safety. A line may allow a move, but visibility, space, and traffic still decide whether it is smart.
- Layered markings at intersections. Stop lines, crosswalks, lane lines, and arrows can appear together and compete for your attention.
- Winter wear. Faded paint, glare, rain, and snow make line reading harder, which is exactly why Ontario learners get tested on it.
If you learn road lines as a system instead of a set of isolated facts, the G1 questions start to feel less like memorization and more like common sense. You are not just naming paint. You are learning where the road expects your car to be, even on the messy days when the markings are hardest to see.
The Two Colours That Run Ontario's Roads
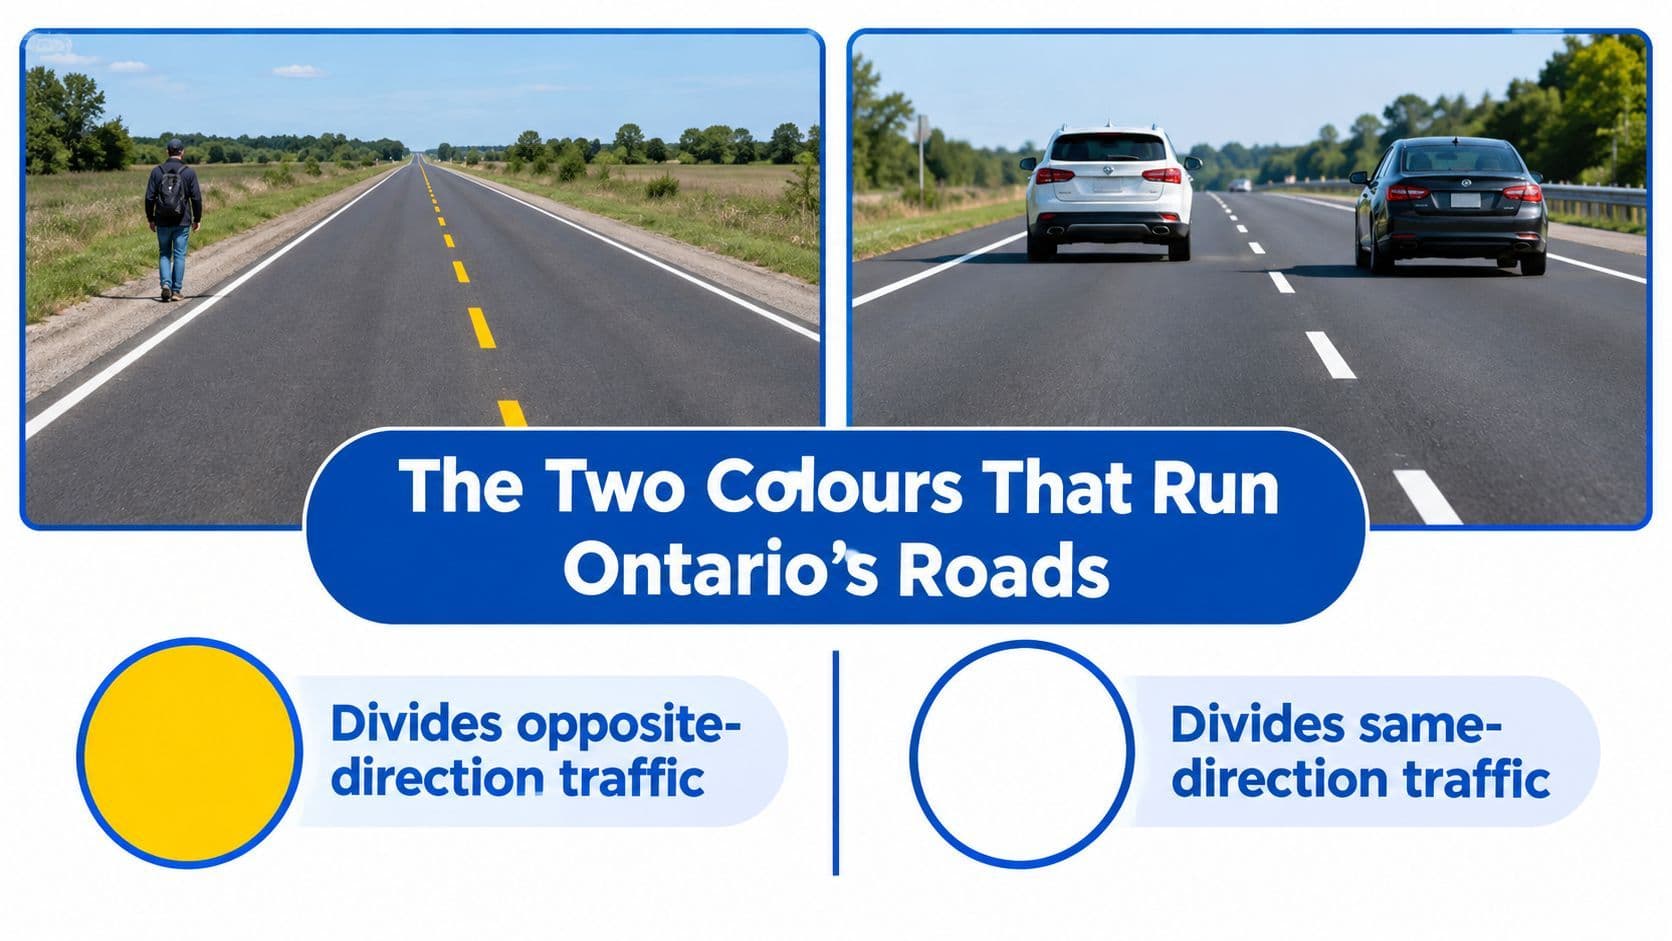
You pull onto a March road in Ontario just after sunrise. The pavement is wet, the snowbanks are dirty, and some of the paint looks half-erased. In that kind of light, one quick colour check helps you stay oriented before you sort out anything else. Yellow means traffic could be coming toward you. White means the traffic beside you is travelling your way.
Yellow means opposing traffic
Ontario's official handbook says that yellow lines separate traffic travelling in opposite directions, while white lines separate traffic moving in the same direction, as set out in the printed MTO Driver's Handbook guidance. That single rule is the base layer for reading the rest of the pavement.
On a typical two-lane road, the centreline is yellow because it divides you from oncoming vehicles. You may also see yellow on the left edge of an undivided road. A simple way to read it is this: if the line marks the side where a wrong move could put you into opposing traffic, expect yellow.
That matters on the G1 because colour is often the first clue in the question. If you mix up yellow and white, you can misread the whole setup before you even get to passing, turning, or lane position.
White means same-direction travel
White paint organizes vehicles travelling in the same direction. You will usually see it between lanes moving your way, at stop lines, around turn lanes, and along many right-side edge lines.
A parking-lot aisle is a useful comparison. Cars may be beside you, but they are meant to flow the same way through the space. White road markings do a similar job on public roads. They sort movement, show where one lane ends and another begins, and help you place the car correctly.
Use this quick memory aid:
- Yellow: separates you from traffic that may approach from the opposite direction
- White: separates or guides traffic travelling in your direction
New drivers sometimes expect the rule to change on busy city streets or faded rural roads. It does not. The hard part is that winter wear, salt, slush, and glare can make the colour harder to spot, especially when yellow looks dull or white reflects sunlight. On those days, use the road shape, signs, and the position of other vehicles to confirm what the paint is trying to tell you.
That is also why G1 line questions can feel more practical than they first appear. The test asks for the official rule, but the skill is recognizing that rule even when the markings are worn and the road is not giving you a perfect, fresh-painted picture.
Centreline Rules That Decide If You Can Pass
You are on a two-lane road behind a slow pickup. The pavement is damp, the sun is low, and the centreline looks half-faded from winter wear. This is the moment many new drivers get wrong. They look only for a gap in traffic, but the first question is simpler. What is the line beside you allowing from your side?
A centreline separates traffic coming toward you from traffic going your way. For passing, it answers one practical question. May you enter the oncoming lane to get around another vehicle, or must you stay where you are?
The three patterns that matter most
Ontario Centreline Patterns and Passing Rules What It Means Driver Action Broken yellow line Passing may be allowed if the way is clear Check mirrors, signal, shoulder check, and pass only if you can see enough open road ahead Solid yellow line Passing is unsafe from your side Stay in your lane; you may still turn across it to enter a driveway or side road when safe Solid and broken, or double solid yellow Passing is generally prohibited from the side next to the solid line Obey the solid side; do not begin a pass from that side
A broken yellow line gives permission only if the road ahead is open. A solid yellow line means do not start a pass from your side. With a solid line beside one direction and a broken line beside the other, the broken side may pass when safe, and the solid side may not.
That rule sounds tidy on paper. Real roads are less tidy.
On a rural road in March, salt stains and old plow wear can make a broken yellow line look almost solid until you get close. In bright glare, the opposite can happen. A solid line can look washed out and uncertain. Treat any unclear centreline with extra caution. Slow down, keep your place, and use the road shape, warning signs, and sight distance to confirm what the marking is likely telling you.
A hillcrest is a good example. Even if the paint ahead seems broken, you should not pass if the rise hides oncoming traffic. A curve through trees creates the same problem. The line is part of the decision. Your view is the other part.
Many G1 questions are built around that exact split. The test may show a broken yellow line, but the safer answer still depends on whether the way is clear and whether you are near a place where passing is restricted.
Ontario also has no-passing zones that learners often forget. Passing is not allowed within 30 metres of a pedestrian crossover. Passing to the left of the centreline is also not allowed within 30 metres of a bridge, viaduct, or tunnel, according to the Ontario handbook's passing rules.
If you are studying these line meanings alongside location-based passing rules, the G1 Ready guide to Ontario road rules gives practice scenarios that match the way these questions often appear on the test.
Lane Lines, Turn Arrows, and Where Your Lane Stops
You are coming up to a wide intersection after a long Ontario winter. The paint is dull, the sun is low, and the right lane starts to bend toward a turn pocket. If you wait until the last few seconds to sort it out, the road feels busy fast. If you read the lane lines early, the whole scene gets simpler.
Centrelines deal with traffic coming toward you. Lane markings answer a different question. They show where your lane begins, where it continues, and where it stops being yours.
White lane lines and continuity lines
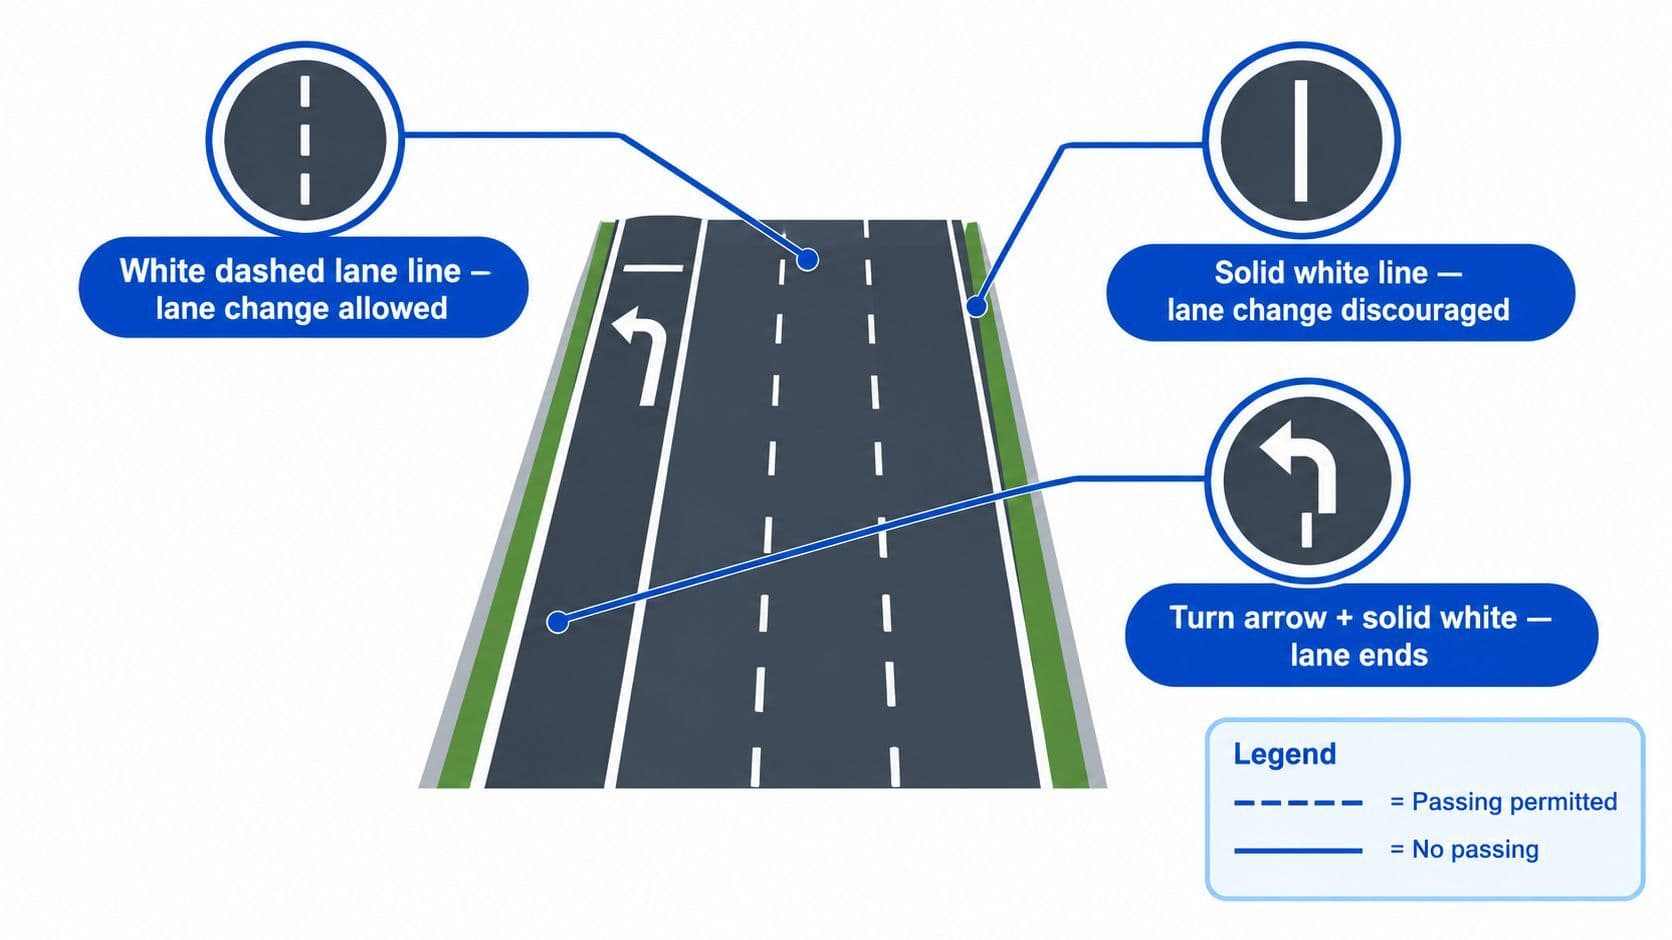
White lane lines separate traffic moving in the same direction. A broken white line usually means you may change lanes if the way is clear. A solid white line gives a firmer message. Stay in your lane unless a movement is clearly permitted and safe.
On paper, these markings are laid out in standard patterns so drivers can recognise them quickly. On real roads, especially after snowplows, salt, and patch repairs, the pattern may be faded or uneven. That is where new drivers get caught. They look only at the paint right beside the car, instead of reading farther ahead to see what the lane is becoming.
A continuity line helps with that. It works like a set of guide marks leading you through a change in the road. You often see it where a lane is ending, where an on-ramp joins, or where an exit lane starts to peel away. Those short white markings are the road's way of saying, "follow this path carefully, because the lane shape is changing."
For G1 purposes, the simple rule is this. Broken white usually allows a lane change if safe. Solid white usually warns against drifting or changing lanes casually. Continuity lines often mean a merge, a split, or a lane drop is ahead.
Turn arrows and lane commitment
Painted arrows tell you what that lane is for, not what you hope to do at the last second.
A left-turn-only arrow means that lane is for left turns. A right-turn-only arrow means use it only if you plan to turn right. A straight arrow means go straight from that lane. A combined arrow, such as left-and-straight, means either movement is allowed from that lane.
That last one causes hesitation on the G1 test and at real intersections. Learners often see a combined arrow and assume they can decide late. The safer habit is to decide before you reach the front of the line. Once traffic is boxed in beside you, your options shrink.
A common suburban setup makes this easy to picture. Near a plaza entrance, the curb lane develops a right-turn arrow. The centre lane carries straight traffic. The left lane allows left or straight. If you stay in the curb lane because it looked open a few seconds ago, then notice the right-turn arrow too late, you are no longer choosing freely. The pavement has already chosen for you.
Use a calm sequence:
- Scan the road ahead early, especially for arrows that may be faded near the intersection.
- Match your lane to your plan before traffic stacks up.
- If you need to change lanes, signal and do it early.
- Once you enter an arrow-marked lane, follow that instruction through the intersection.
This is one of the places where Ontario test logic matches real driving closely. G1 questions often ask what a lane arrow means, but the practical lesson is bigger. An arrow is a lane-use instruction. It is not a suggestion.
Edge lines help too. They mark the outer limit of the usable roadway and help you avoid creeping onto a shoulder, painted buffer, or other space that is not part of your travel lane. On dark, wet, or slushy roads, that outside line can be the clearest clue you have about where your lane still exists.
Stop Lines, Crosswalks, and Pedestrian Crossovers
You roll up to a wide intersection on a bright winter afternoon. The sun is low, the white paint is worn from plows, and the markings ahead look washed out. Many new drivers creep too far forward without meaning to here. A stop line, a crosswalk, and a pedestrian crossover can blur together unless you know what each one is asking you to do.
Start with the stop line. It is the solid white bar across your lane that marks where your vehicle should stop at a red light or stop sign. It protects the space ahead of it.
That space is often for people on foot.
If your front bumper passes the stop line, you may already be blocking the path a pedestrian needs, even if you have not entered the middle of the intersection. That is why driving instructors often teach a simple visual check. Stop where you can still see the white line meet the road in front of your hood. In a sedan, SUV, or crossover, that habit gives you a repeatable reference when the painted bar is clear and when it is faded.
Crosswalk markings come next. The basic version is usually a set of white parallel lines that mark the walking path across the road. Your job is straightforward. Keep that space clear, watch carefully for pedestrians, and do not stop on top of the markings just because traffic ahead moved late.
A pedestrian crossover needs even more attention. In Ontario, it is typically marked by white crossing lines plus an X symbol on the road as drivers approach. The paint matters, but the test-day point matters too. A crossover is a place where pedestrians have specific right-of-way protections, and drivers are expected to recognize it even when the markings are not picture-perfect. If you want a plain-language breakdown, this guide to Ontario pedestrian crossover rules lays out what drivers are expected to do.
Here is the quick way to sort the markings in real time:
Crossing Markings at a Glance Driver Action What It Means for You Stop line Stop behind it Leave the space ahead clear Standard crosswalk markings Watch for pedestrians and do not block the crossing Expect foot traffic at intersections and crossing points Pedestrian crossover markings Yield properly and stay alert for anyone entering or using the crossing Treat the area with extra caution, including nearby passing restrictions
That last point shows up on the G1. Ontario rules also restrict passing near a pedestrian crossover, so the crossing changes more than where you look. It can change what manoeuvres are legal as you approach.
A common mistake happens. The light is red, there is no vehicle ahead, and the driver eases forward because the crosswalk lines are faded or hidden by slush. Then a pedestrian steps out from the curb, and the car is already sitting in the walking space. The better sequence is simple. Stop at the white bar first. Scan the crossing area second. Hold your position until the path is clear and your signal or sign allows you to go.
Read these markings as one small system. Stop line first. Walking space next. People first, always.
When the Lines Disappear in Rain, Snow, or Glare
You are driving home on a February evening. The road is shiny, the snowbanks are high, and the paint that looked clear at noon now seems to melt into the pavement. This is the part many G1 learners worry about, because the handbook shows clean lines, but real Ontario roads often give you faded paint, slush, and headlight glare instead.
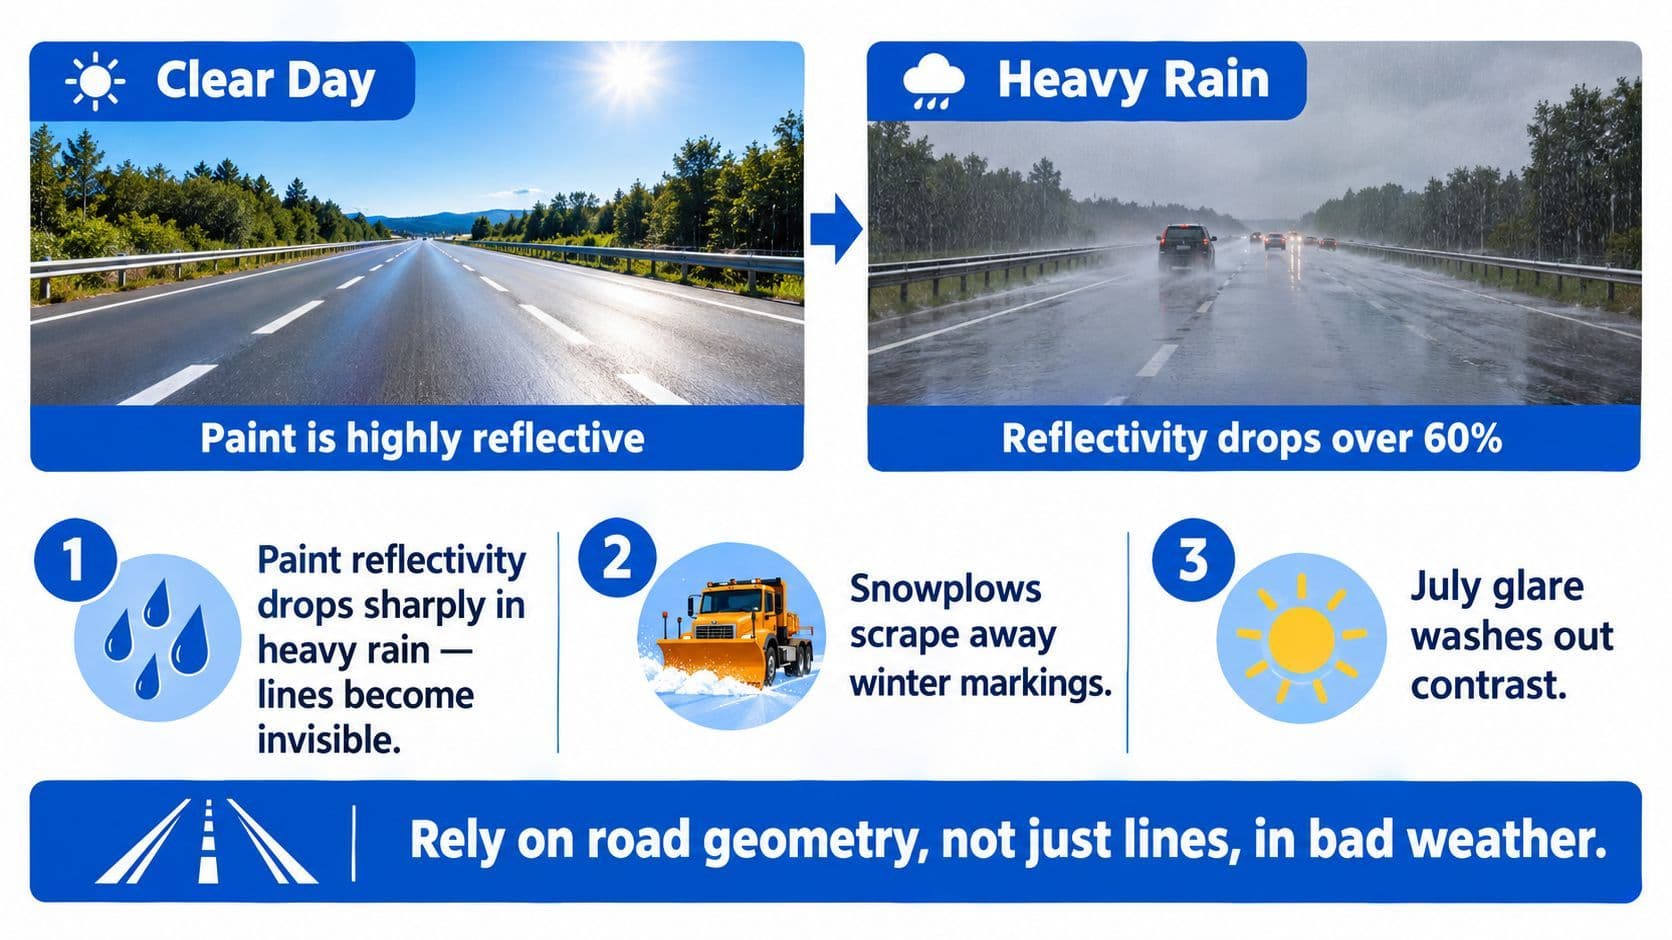
Canadian road-safety and industry guidance notes that reflective or wet-night pavement markings are designed to stay visible when ordinary markings seem to vanish, because non-wet reflective lines lose visibility when roads are wet, as explained in 3M Canada's pavement-marking overview. The rule on the road has not changed. Your ability to read the paint has.
That difference matters on the G1 and on the street. Test questions usually show sharp markings and ask what a line means. Real driving asks a second question: what do you do when you know the rule, but the line is hard to see?
Start by driving the road's shape, not just its paint. Curbs, snowbanks, lane width, the position of other vehicles, and the bend of the roadway all help you trace where your lane likely goes. It works like following the edges of a hallway when the floor pattern is hard to make out. You are still staying in your space, just using the walls and layout to judge it.
A safe sequence helps:
- Slow down so you have time to read the road ahead.
- Leave more space because the driver in front may brake early.
- Hold your lane unless you can clearly see where the next lane begins.
- Use fixed clues such as curbs, guardrails, reflector posts, and snowbanks to judge position.
- Watch for temporary markings in construction zones, because the newest visible markings are the ones to follow.
Here is the key point learners often miss. Faint paint does not cancel Ontario's line rules.
If a centreline is hidden under slush, you do not assume passing is allowed. If rain hides the edge line, the shoulder is still not part of your lane. If glare washes out a turn lane arrow, you do not drift left and hope. You wait until you can confirm what the road is asking for, or you choose the simpler action and stay put.
That is the same habit that answers many G1 line questions correctly. When the line is uncertain, the safe answer is usually the more conservative one: do not pass, do not change lanes casually, do not crowd the edge, and do not guess where your lane ends.
Common G1 Test Questions About Road Lines
A lot of G1 line questions are really driver-choice questions. You are rolling toward an intersection on a bright winter afternoon, the paint is a little faded, and the test is asking, "What should you do with the information you still have?" That mindset helps more than memorising labels by themselves.
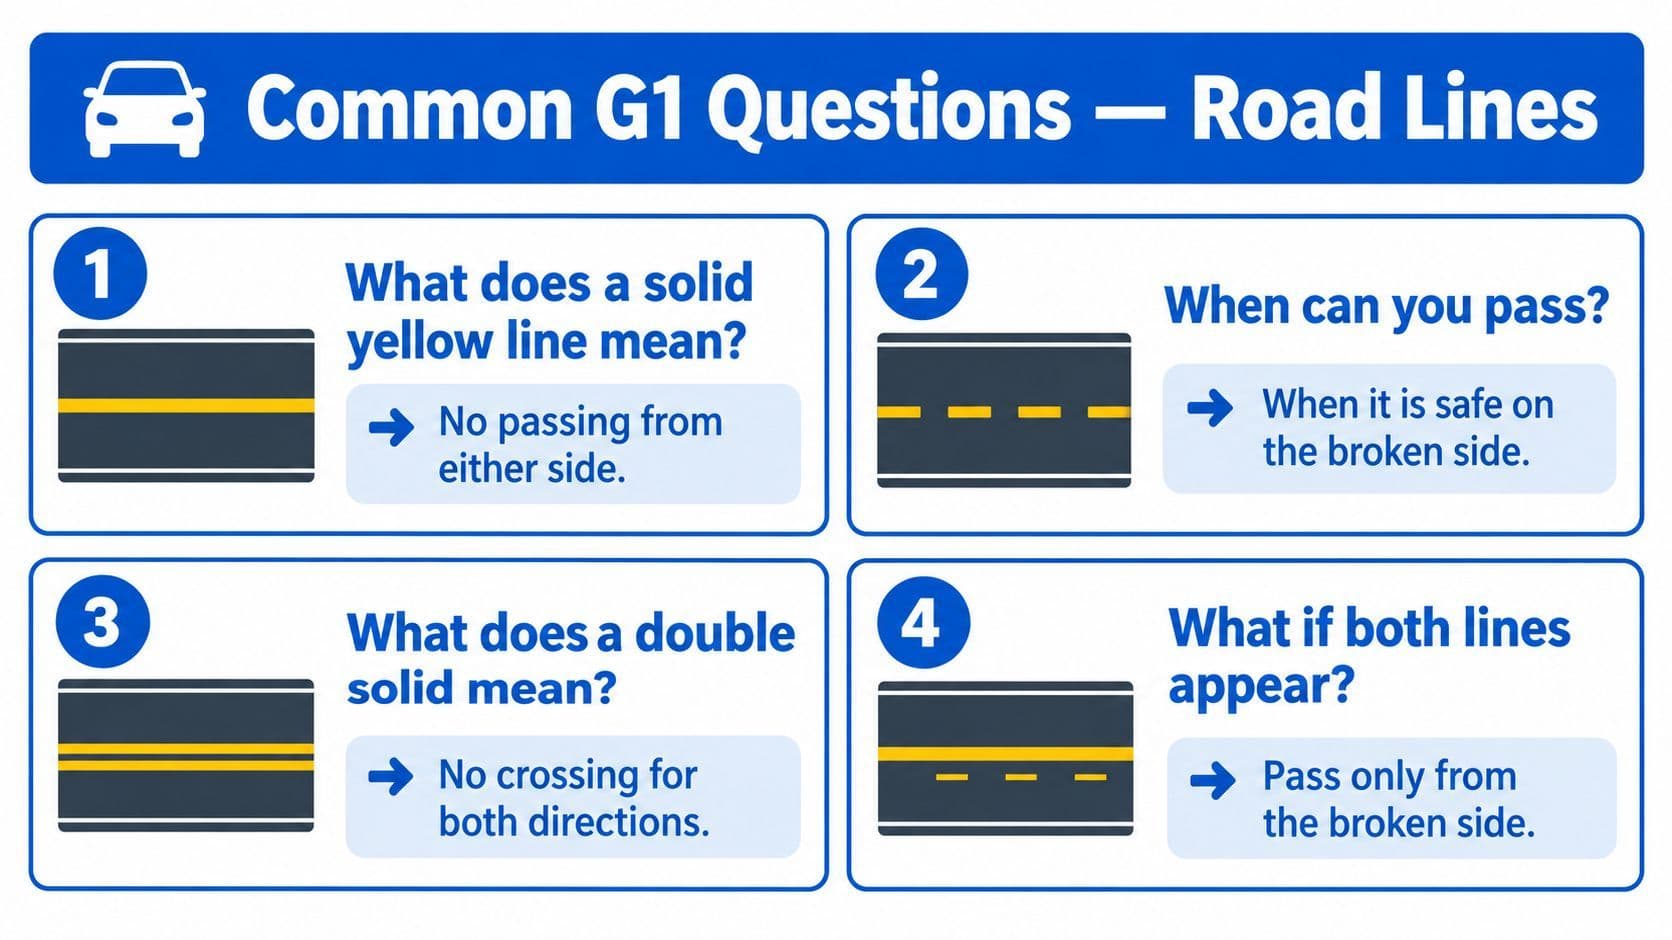
Five question styles worth practising
What does a solid yellow line mean?
It means you should stay on your side and not begin a pass from that lane. On the test, treat it as a boundary line, not a suggestion.
Ask yourself: If the car ahead slows down, would I still wait?
When can you cross a broken yellow line to pass?
You may pass only when the road ahead is clear and you can return to your lane without forcing the move. A broken line gives permission to consider passing. It does not promise that passing is safe.
Ask yourself: Do I have enough open road to get back in smoothly?
What does a solid-and-broken yellow combination mean?
The rule depends on your side. If the broken line is beside your lane, you may pass when safe. If the solid line is beside your lane, you should not start a pass. This is one of the easiest G1 questions to miss when learners focus on the whole marking instead of their own position.
Ask yourself: Which line is beside me right now?
Where do you stop at a red light if there is a stop bar?
Stop behind the solid white line. Picture the stop bar as the front edge of a waiting room. Your car stays out of the crossing space until it is your turn to move.
Ask yourself: Am I stopping before the line, not on it?
What do marked pedestrian crossing lines tell you?
They mark space that must stay clear for people crossing. In real Ontario driving, this matters even more when snowbanks narrow the road or worn paint blends into wet pavement. The safe test answer is still the same. Protect the crossing and do not block it.
Ask yourself: Would a person on foot have a clear path in front of my car?
Study the action behind the line
The G1 often changes the wording, but the action stays the same. Yellow centre lines usually lead to pass-or-don't-pass questions. White stop lines lead to where-do-I-stop questions. Crosswalk and crossover markings lead to yield, stop, and keep-clear questions.
That is why practice works best when it sounds like a scene on the road, not a flashcard. If you want more Ontario-style examples phrased the way learners see them, the traffic rules practice question guide is a useful place to drill common wording and line-rule decisions.
Your Quick Reference for Test Day and Beyond
On test day, treat road lines like quick signals, the same way you read a teacher's hand motion in a parking lot or a cashier's "next person" line. You do not need a long speech in your head. You need a fast check of colour, pattern, and position.
A simple scan works well. Yellow tells you the line is managing traffic coming toward you. White tells you the line is organizing traffic moving your way. Solid usually means hold your place. Broken means a move may be allowed if the road, traffic, and visibility give you enough room to do it safely.
Then add the Ontario reality learners run into after the handbook closes. In winter, paint fades under salt, slush, and tire wear. In rain, white markings can disappear into headlight glare. When that happens, the rule does not vanish. Use the road's shape, the curb, other lane positions, and a larger space cushion to confirm where your lane likely runs.
For G1 questions, connect each line to the action it is testing. Yellow centre line. Can I pass or must I stay? White line beside me. Am I changing lanes or staying in my lane? White stop line. Where does my car stop? Crosswalk or crossover markings. Do I need to stop, yield, or keep the space clear?
One habit helps both for the written test and for real driving. As you approach an intersection on a familiar street, name the line before you reach it and say what it makes you do. After a few drives, the markings stop feeling like random paint. They start reading like instructions.


