
You're sitting at a DriveTest centre, your examiner points toward a curbside space, and suddenly a manoeuvre you've practised feels much smaller than it did in an empty lot. The pressure usually comes from trying to judge the space by instinct. Parallel parking in Ontario is easier when you treat it as a measured sequence, with clear reference points for the approach, the turn, and the final position.
Ontario's official handbook gives you the useful starting measurements: the space should be about one and one-half times the length of your vehicle, you should position yourself about one metre from the parked vehicle beside you, and training material for the G2 test commonly uses a final curb gap of 30 cm. The Ontario Driver's Handbook parking guidance defines the manoeuvre and sets out the positioning sequence. Learn those references first, then practise until your hands and eyes recognise them without panic.
Why Parallel Parking in Ontario Feels Different
Parallel parking feels difficult because several judgements happen together. You're judging the available space, controlling the brake, checking traffic, turning the wheel, and watching the curb. If you rely only on what “looks about right,” a small error at the beginning can leave you too far from the curb or too close to the vehicle behind you.
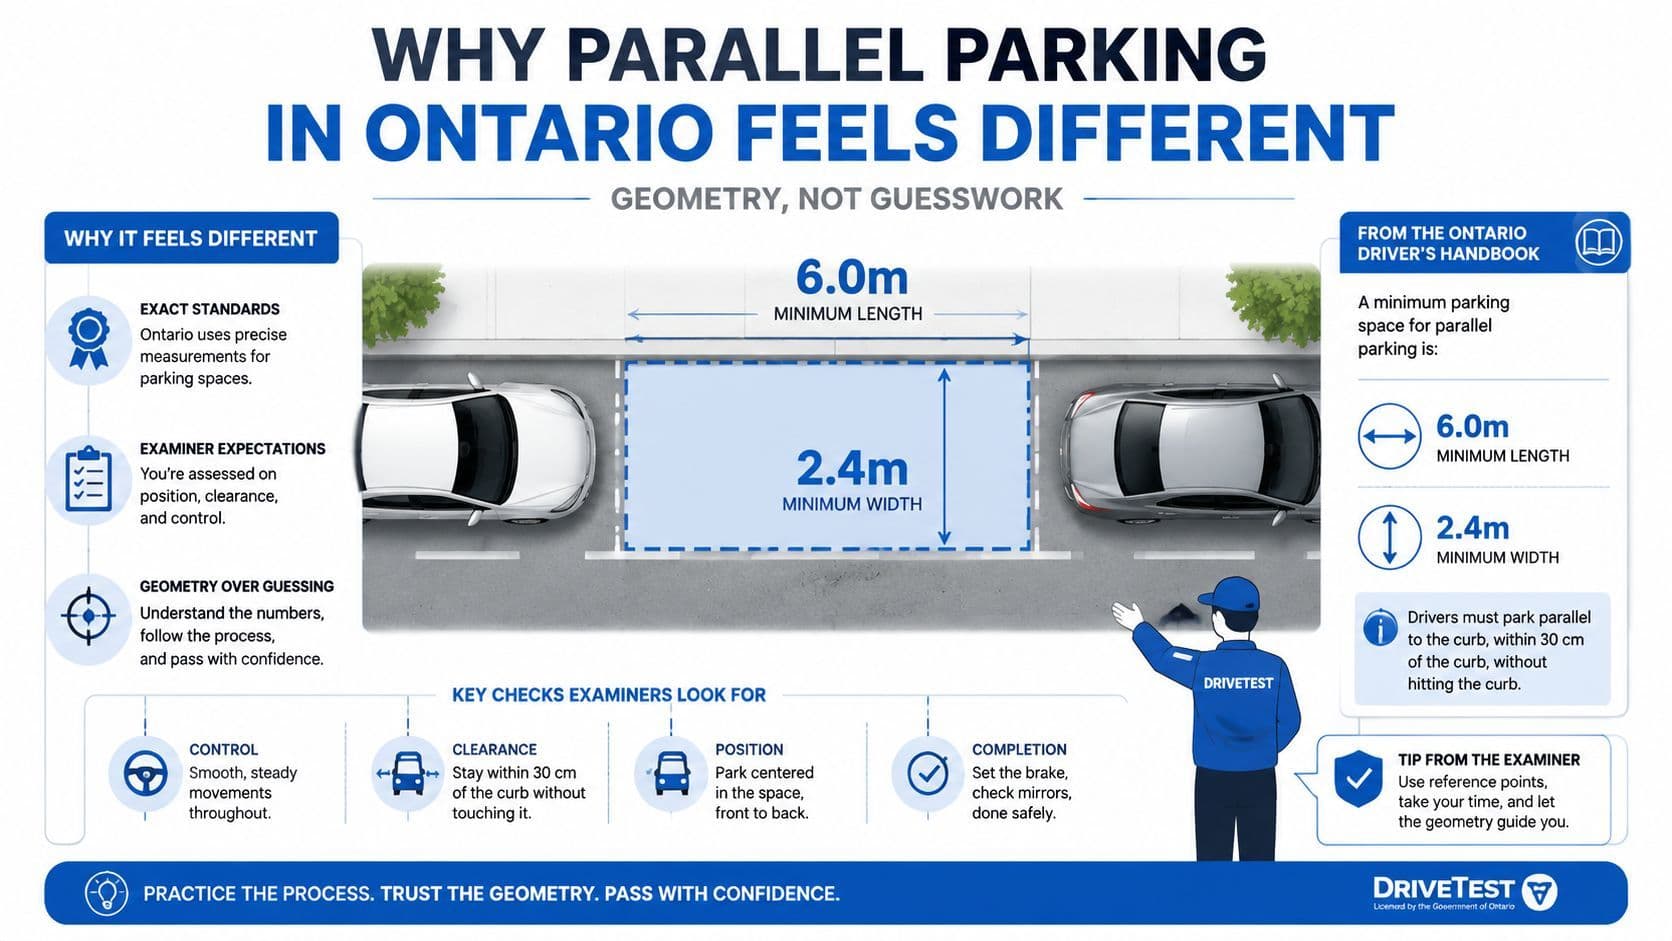
The Ontario standard gives you something more dependable. A suitable space is about one and one-half times your vehicle's length, and your initial side clearance beside the parked vehicle should be about one metre, according to the official Ontario parking instructions. That turns the exercise into geometry. The first position sets the path of the rear wheels, the first steering input creates the entry arc, and the final correction brings the vehicle parallel to the curb.
What the examiner can see
The evaluator isn't only watching whether the vehicle ends up in the space. They're also watching how you prepare and whether you remain in control. Signal use, mirror checks, blind-spot checks, speed, curb clearance, and the final position all communicate whether you understand the manoeuvre.
Ontario's handbook says that vehicles should generally park parallel to the curb, on the right side of the road in the direction of traffic. A one-way road can allow parking on both sides unless signs state otherwise, as described in the Ontario Driver's Handbook parking rules.
The final position matters just as much as the entry. Ontario test-preparation material commonly identifies 30 cm from the curb as the G2 parallel-parking target, while also emphasising observation before reversing. Use the curb as a measurable reference, not as something you'll correct by guessing at the end.
Practical rule: Start accurately, reverse slowly, and make each steering change at a visible reference point.
Setting Up Your Approach the Right Way
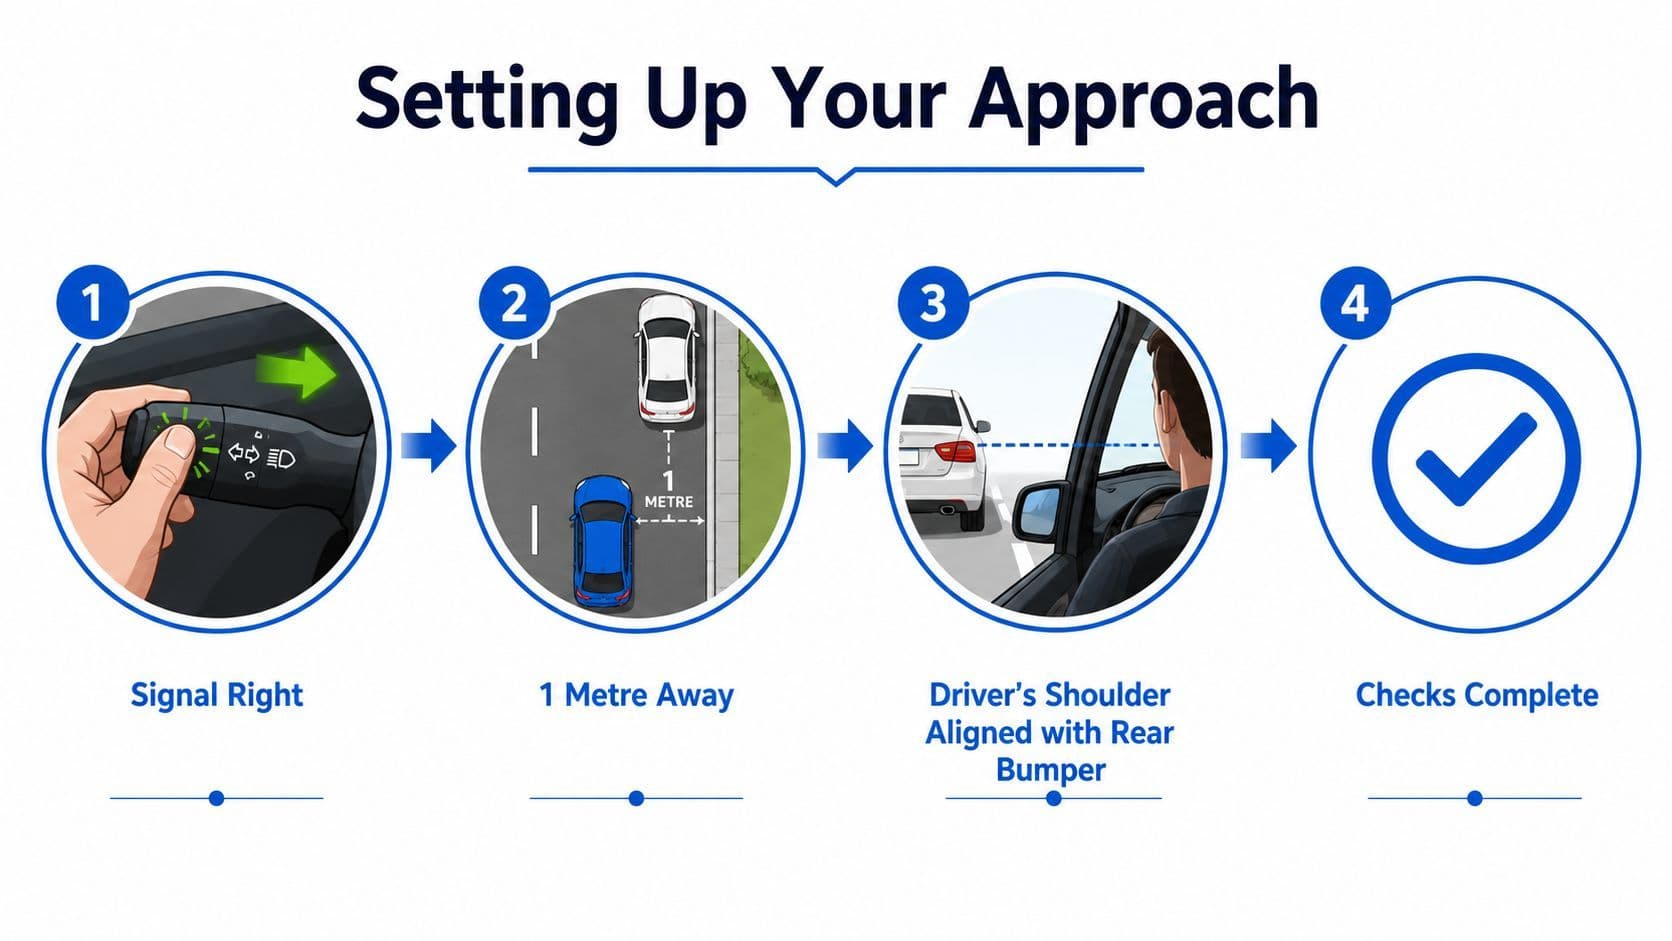
The setup determines whether the rest of the manoeuvre feels smooth or rushed. Before you turn toward the space, signal right early enough to communicate your intention. Check the interior mirror and side mirrors, then scan the area beside and behind the vehicle. Your car should come to a controlled stop beside the vehicle in front of the space, about one metre away.
Use a repeatable body reference rather than trying to estimate the bumpers from the driver's seat. Stop when your shoulder is approximately aligned with the rear bumper of the vehicle beside you. This reference works across a sedan, hatchback, or small SUV because it connects your seated position to a visible point on the other vehicle.
Prepare your view before moving
Set your mirrors before you begin the reverse. Your passenger-side mirror should give you a useful view of the rear curb corner, while the driver-side mirror helps you monitor traffic and the vehicle behind you. Don't treat the mirrors as a substitute for a shoulder check. Turn your head over your right shoulder and confirm the blind spot is clear before the vehicle moves.
The official Ontario sequence describes pulling alongside the parked vehicle with about one metre of clearance, stopping with the rear bumper aligned with the other vehicle, then reversing while turning toward the curb. That sequence appears in the Ontario MTO handbook parallel-parking video, which you can use as a visual supplement to the written instructions.
If the road slopes downhill, keep your foot firmly on the brake while setting up. Practise the transition from a full stop to a controlled reverse so the vehicle doesn't roll or lurch when you release the brake. The same habit helps in a practice lot where cones mark the space and in real traffic where the curb, parked vehicles, and following drivers create more visual pressure.
Confirm the space before committing
Look at the whole space, not only the front car. It should provide about one and one-half times the length of your vehicle, as specified by Ontario's official guidance. If the space is clearly too short, don't force the manoeuvre. A calm decision to continue looking is safer than entering a space that leaves no room to straighten.
Your setup has three jobs: create the one-metre side clearance, establish the shoulder-to-bumper reference, and confirm that the entire space is usable. Once those are correct, the steering sequence becomes much more predictable.
The Three-Phase Parking Sequence
A learner in a practice lot often says, “I turned too early,” when the actual problem began with the initial position. During one deliberate practice run, start by naming each action aloud: signal, mirrors, shoulder check, stop, reverse. That narration keeps the manoeuvre organised and gives you a clear reset point if something doesn't look right.
Phase one creates the entry arc
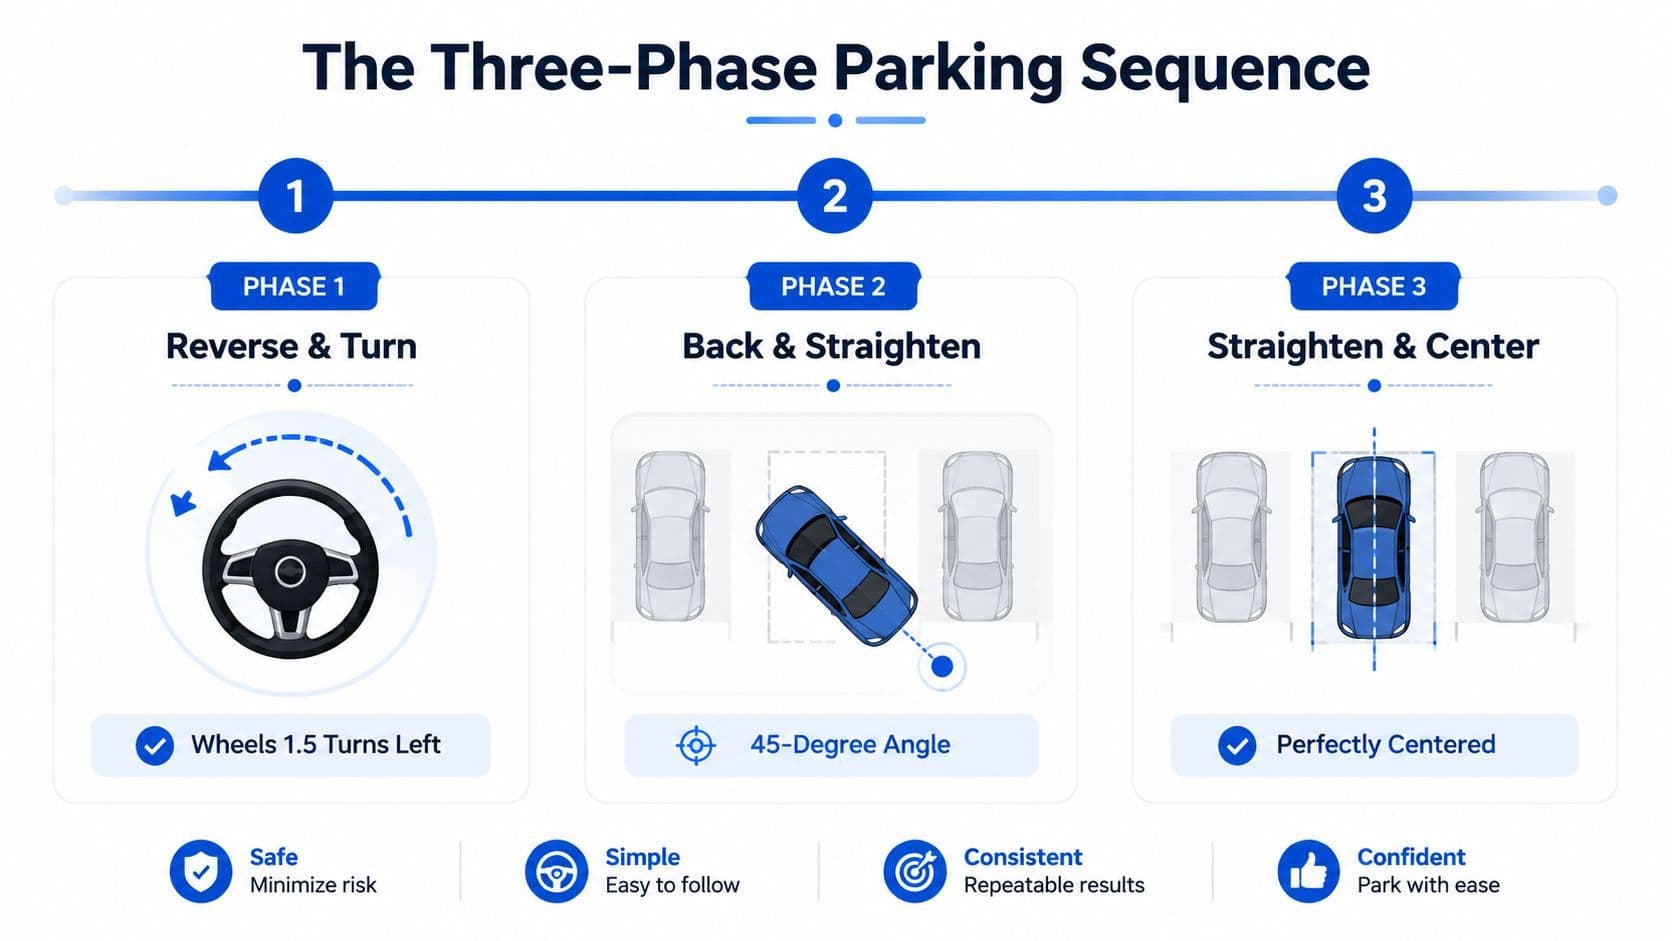
With the vehicle stopped and the wheels straight, confirm the mirrors and right blind spot again. Select reverse and move at a very slow, controlled pace. Ontario's official sequence tells you to reverse while turning fully toward the curb once you're correctly aligned beside the parked vehicle.
Keep looking through the rear window and use the passenger mirror to monitor the curb-side rear corner. Don't stare at one object for the entire manoeuvre. Scan the space, the curb, the parked vehicles, and the surrounding traffic. If a pedestrian, cyclist, or vehicle enters the area, stop and reassess.
Phase two controls the angle
As the rear of your vehicle moves into the space, the car develops an angle. The exact visual reference changes with vehicle size, seat position, and mirror adjustment, so use the curb line and the front vehicle's visible corner together rather than relying on a memorised wheel count.
The Ontario handbook sequence instructs you to straighten once the outside rear corner of the front vehicle becomes visible. In practical terms, ease the wheel back to straight when your entry arc has brought the rear of your car into the space and the front vehicle is no longer blocking that reference. Continue reversing slowly, then stop if you need to re-check the surroundings.
Phase three aligns the vehicle
Once the front of your vehicle has cleared the parked vehicle, turn the wheel toward the road to bring the front end into the space. Continue watching the passenger mirror as your primary curb-depth gauge, but keep checking both sides. Stop before the tyres touch the curb.
The goal is a vehicle that is parallel to the curb, positioned on the correct side of the road, and within the practical 30 cm final curb gap used in Ontario G2 preparation guidance. Straighten the wheels when the vehicle is aligned. Turn off the signal, apply the parking brake, and place the vehicle in park, or in the appropriate gear for a manual transmission, following the handbook's finishing instruction.
For hand placement and steering control, review this steering wheel grip guide before practising. Good grip makes it easier to make a smooth correction instead of feeding the wheel too quickly.
The embedded demonstration below can help you connect the reference points to the vehicle's movement:
Common Mistakes That Cost Marks on Test Day
Most failed attempts don't come from one mysterious error. They come from a setup that places the vehicle outside the intended path, followed by a rushed steering correction. Watch for the point in the sequence where the mistake begins, not only the position where it becomes visible.
Oversteering during the entry can send the rear of the vehicle too sharply toward the curb or the front vehicle. A wide final gap usually begins when the first turn is too shallow, the vehicle starts too far from the parked car, or the driver straightens before the rear has entered far enough. A missed signal or blind-spot check is a process failure, even if the vehicle eventually lands neatly.
Mistake When It Happens Score Impact Oversteering into the space During the first reverse and curb-side turn May create a curb or vehicle conflict and can require a correction Leaving a wide curb gap During the straighten and final alignment phase Misses the practical Ontario target of 30 cm Forgetting the right signal Before pulling beside the space or reversing Reduces communication and observation credit Losing the one-metre side clearance During the initial approach Changes the vehicle's turning arc Touching or mounting the curb During entry or final alignment Shows poor control and can create a serious safety concern
The Ontario test-preparation discussion of parallel parking highlights the recurring concerns learners raise, including spacing, blind-spot checks, and the final curb distance. Treat those as practice priorities, but don't assume every individual error has the same result in every examination situation. A dangerous action, loss of control, or failure to observe traffic deserves more attention than a small alignment imperfection that you correct safely.
One correction prevents several errors
The simplest correction is to slow down before the vehicle reaches the wrong angle. If the rear corner is approaching the curb too quickly, stop, secure the vehicle, check all around again, and decide whether a forward re-setup is safer. Don't keep turning and hope the car will somehow straighten itself.
Before every attempt, use the mirror, shoulder-check, and signal routine in the same order. Consistency prevents the common mistake of focusing so heavily on steering that you forget the observation steps.
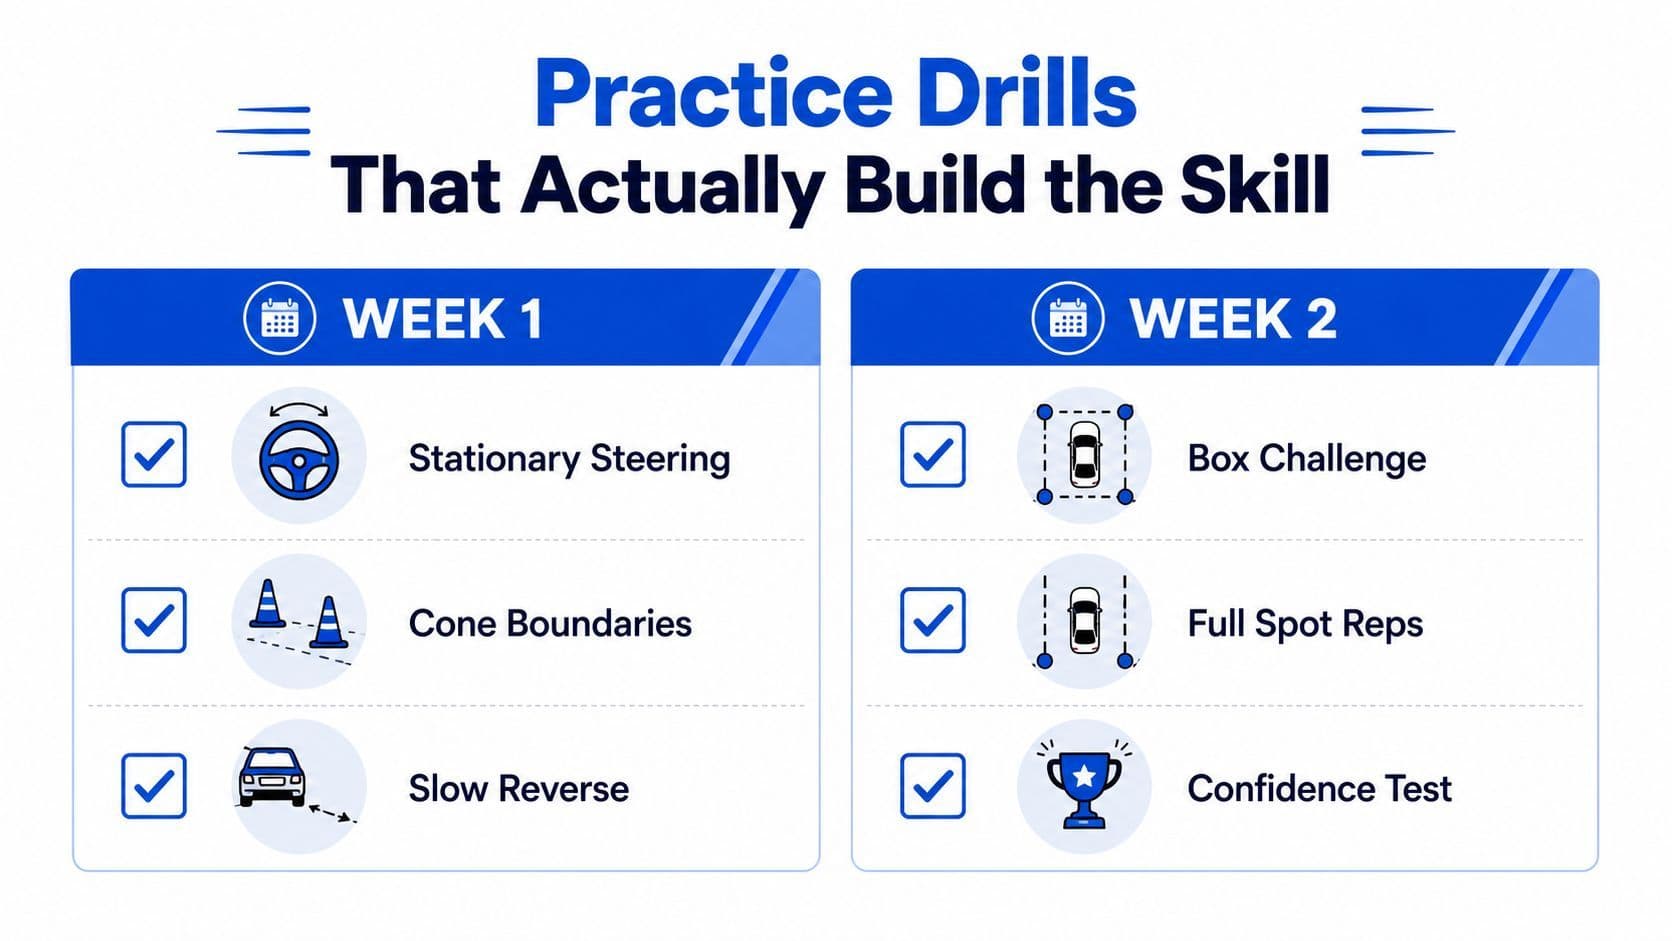
Practice Drills That Actually Build the Skill
Use a quiet residential street where parking is permitted or an empty lot with cones, cardboard boxes, or plastic bins. Don't practise between real vehicles until you can control the car slowly and stop whenever the space or surrounding traffic changes.
A short routine repeated consistently builds more useful awareness than one long session filled with rushed attempts. Track the same outcomes each time: initial side clearance, final curb gap, whether the vehicle ends parallel, and whether every signal and observation step happened in order.
Build control before adding pressure
Start with the vehicle stationary. Sit in the driver's seat and rehearse moving the steering wheel smoothly from one direction to the other, keeping your hands controlled and your eyes oriented toward the intended path. This helps you notice how much steering input your own vehicle requires without adding traffic or brake pressure.
Then practise an empty-space repetition drill:
- Set the boundaries: Place markers to represent the front and rear vehicles, leaving a space based on the Ontario handbook's one-and-one-half-vehicle-length rule.
- Repeat the setup: Signal, pull alongside with about one metre of side clearance, align your shoulder with the front vehicle's rear bumper, and stop.
- Reverse deliberately: Use a slow pace, complete the mirror and blind-spot checks, and pause whenever your reference point isn't clear.
- Score the finish: Note whether you finished parallel, whether the curb gap was close to the 30 cm training target, and whether the vehicle stayed centred.
Practise pulling away and returning to the same space repeatedly, but don't let the exercise become a race. One clean attempt with accurate checks teaches more than a quick attempt that skips them. During the final run, narrate each action aloud, including “signal,” “mirror,” “blind spot,” “reverse,” “straighten,” and “park.”
For a broader routine that combines manoeuvres with general road-test preparation, use this practice guide for driving. Keep a simple notebook. Write down the first error you saw, the reference point you missed, and the one adjustment you'll make on the next attempt.
Test-Day Execution and Recovery Moves
The examiner is looking for safe control from the moment you identify the space. Signal right, check your mirrors, complete the blind-spot check, and bring the vehicle to a full stop before reversing. Move slowly enough that you can stop immediately if traffic, a cyclist, or a pedestrian enters the area.
Ontario's official test information has changed over time, which is why learners hear conflicting advice about whether parallel parking is included in every test. The Ontario Level Two road-test information notes that the G test temporarily removed parallel parking in 2022 to reduce backlog, while later guidance can differ by test type and centre. Follow the instructions given at your appointment rather than arguing with older advice. If the examiner tells you to skip the park and continue, follow that direction safely.
Recover without panic
If your first reverse begins to drift wide, stop before the vehicle reaches an unsafe position. Keep the brake applied, check the surroundings again, and wait for the examiner's direction if one is required. A legal re-pull correction may involve selecting forward gear, moving fully out of the space, and re-establishing the original approach with the signal and observation sequence completed again. Don't make a sharp multi-point correction while surrounded by vehicles.
Once parked, straighten the wheels, set the parking brake, place the transmission in park or the appropriate manual gear, and check the final curb distance. The finish should look settled, not hurried.
Use this mental script before your appointment: “Space, signal, mirrors, shoulder check, stop. One metre, shoulder to bumper. Reverse slowly, turn, straighten, turn toward the road. Parallel, close to the curb, secure the vehicle.” That script keeps your attention on actions you can control, even if the examiner's instruction or the street setting feels unfamiliar.
G1ready.ca offers free, registration-free Ontario G1 practice exams, targeted quizzes, mixed tests, a diagnostic test, and an exam simulator with explanations and hints. Visit G1ready.ca to strengthen the handbook knowledge that supports calm, organised decisions behind the wheel.


