
You're parked on a sloped Ontario street, the curb is close, and suddenly a simple question feels difficult: which way should the wheels point? Many first-time drivers know they need to use the parking brake, but they still hesitate over the wheel angle or forget that a curb changes the answer.
The safest way to learn parking on a hill rules is to stop treating them as a memorisation trick. Think of the curb, the wheel direction, the parking brake and the selected gear as parts of one fail-safe system. If one layer doesn't hold the vehicle, the others should limit unintended movement.
Why Hill Parking Rules Matter in Ontario
You're visiting a friend on a sloped residential street in Hamilton. You pull in, select Park and step out, assuming the vehicle will stay exactly where you left it. Gravity is still working on the car, however, and the curb, wheel angle and parking brake now determine what happens if the vehicle moves.
That's why hill parking is more than a G1 knowledge-test detail. A vehicle that rolls can enter traffic, strike another vehicle or move towards a pedestrian. Ontario's varied streets, including the hills found in communities such as Hamilton and Ottawa, make this a practical skill for new drivers, newcomers and parents teaching teens.
Ontario's official Driver's Handbook guidance on parking along roadways connects wheel position to the slope and the presence of a curb. The handbook's diagrams present the technique as protection against brake disengagement and unintended vehicle movement. In other words, the correct wheel angle gives a rolling vehicle a safer path.
The fail-safe idea
No single action should carry the entire responsibility. Parking in Park or in the appropriate manual-transmission gear helps hold the vehicle. The parking brake adds another holding mechanism. Correctly angled wheels create a final physical direction, allowing the curb or roadside to help keep the vehicle away from traffic.
Practical rule: Before leaving the vehicle, ask where it would go if it started rolling. Then position the wheels so that path leads away from traffic.
This question also helps with G1 scenario questions. Instead of guessing from the words “uphill” or “downhill,” identify the slope, check whether there's a curb and consider the direction of a possible roll. Once you understand that logic, the rule becomes easier to apply on a real street and under test pressure.
How to Position Your Wheels on a Hill With and Without a Curb
Start with two observations: which way the vehicle is facing on the slope and whether a curb is present. The wheel direction changes because the curb can act as a physical stop in one situation, while a roadside or shoulder provides the safer escape path in another.
Facing uphill with a curb
Turn the steering wheel left, so the front tires rest against the curb if the vehicle rolls back. The curb becomes a backup stop, limiting rearward movement and helping prevent the vehicle from continuing into the roadway.
Facing uphill without a curb
Turn the wheels sharply right. If the vehicle rolls, it should move away from traffic rather than continue along the road. Without a curb, you're choosing a direction that takes the vehicle towards the shoulder or away from the traffic lane.
Facing downhill
Turn the wheels right, towards the curb or shoulder. A downhill vehicle naturally tends to move forward down the slope, so the wheel position should direct it towards the edge of the roadway instead of into traffic.
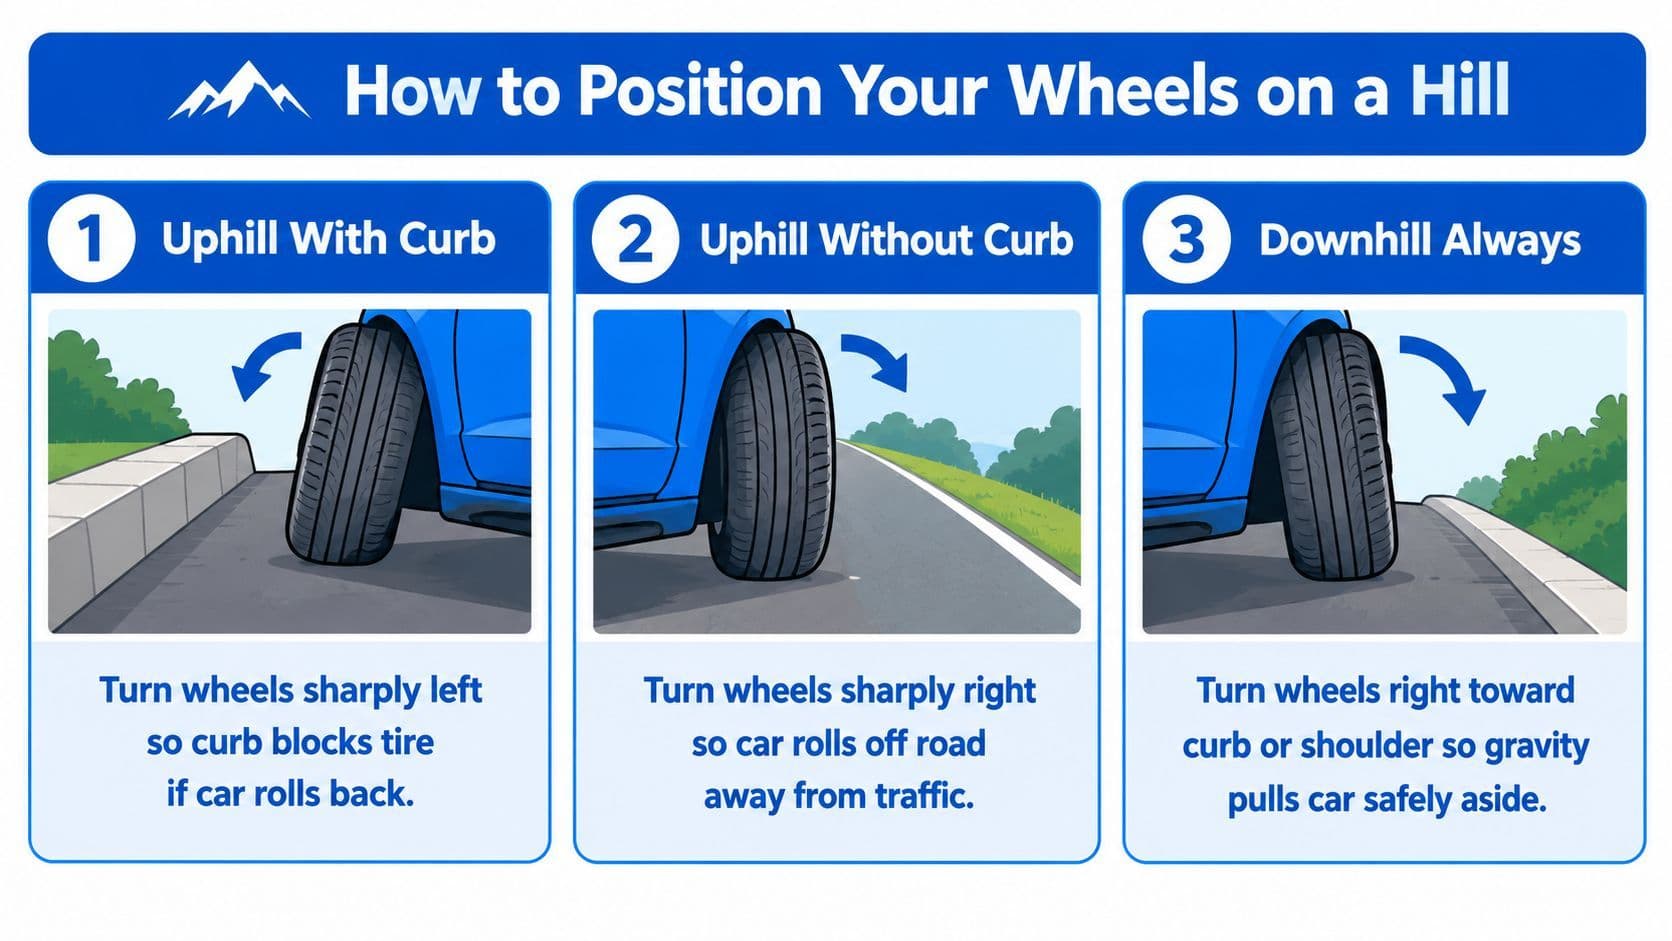
Parking Situation Wheel Direction What Happens If Vehicle Rolls Facing uphill with a curb Turn left The front tires can rest against the curb and limit backward movement Facing uphill without a curb Turn sharply right The vehicle rolls towards the shoulder and away from traffic Facing downhill Turn right The vehicle rolls towards the curb or shoulder
A common mistake is to remember only “uphill means left” or “downhill means right.” That shortcut fails because uphill parking depends on whether there's a curb. Read the entire situation before moving the steering wheel.
For a visual reminder, this video demonstrates the same decision process:
The Ontario handbook also pairs wheel positioning with the parking brake and transmission setting in every hill-parking case. An automatic should be placed in Park, while a manual should be left in first or reverse gear, according to the parking situation and the handbook's instruction.
Safe Hill Parking Sequence Every Ontario Driver Should Follow
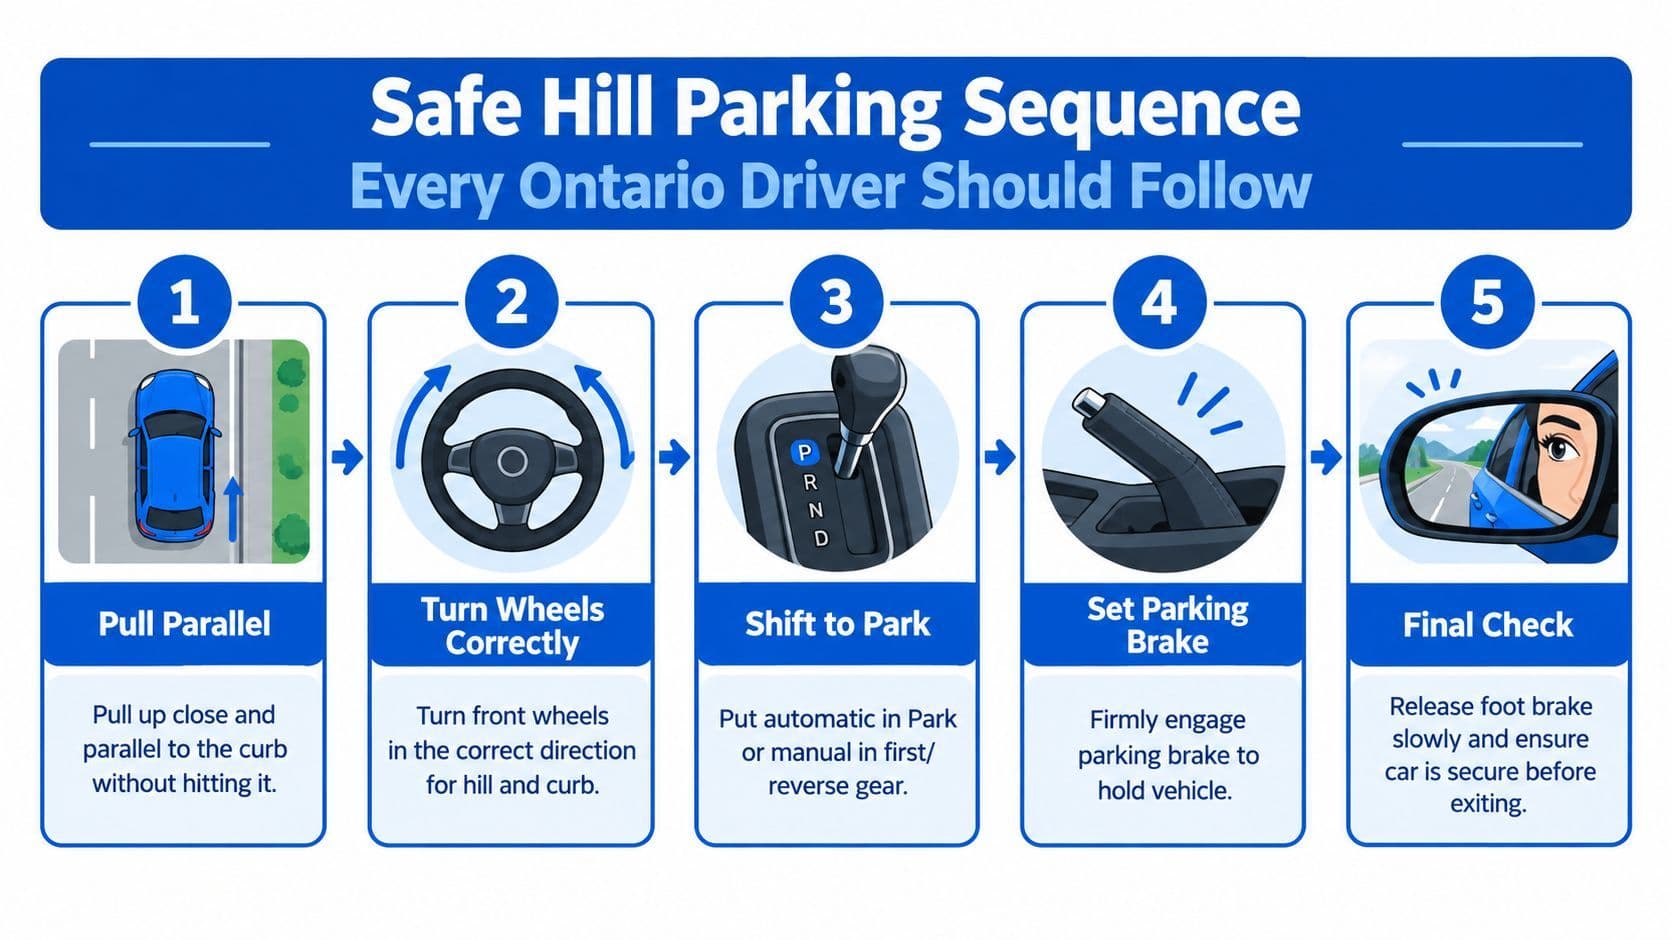
A calm sequence prevents the last-minute scramble that causes learners to forget the brake or leave the wheels straight. Approach the space slowly, keep the foot brake pressed while positioning the vehicle, and pull close and parallel to the curb without striking it.
Once the vehicle is settled, decide the wheel angle from the slope and curb. Facing uphill with a curb calls for the left position. Facing uphill without a curb calls for a sharp right position. Facing downhill calls for the right position towards the curb or shoulder.
Build in more than one hold
After turning the wheels, select the appropriate transmission setting. Put an automatic in Park. For a manual transmission, use first or reverse gear as appropriate. Then engage the parking brake firmly.
These actions work together. The transmission setting helps resist movement, the parking brake holds the vehicle and the angled wheels provide a safer direction if movement still occurs. Don't rely on the gear selector alone, especially when you're practising on a noticeable incline.
Before removing your foot from the brake, confirm that the parking brake is engaged and the gear is selected. Release the foot brake slowly and watch for any unexpected movement. If the vehicle shifts, press the foot brake again and correct the setup before exiting.
A final check isn't wasted time. It confirms that the vehicle is stationary before you open the door.
Look around the vehicle before stepping into the roadway. When you leave the space later, use the same cautious habits you'd use for any manoeuvre, including the observation routine described in this mirror, shoulder check and signal guide. Hill parking is secure only when the vehicle stays controlled during both parking and departure.
Legal Restrictions and Signage That Affect Hill Parking
Correct wheel direction doesn't automatically make a parking space legal. A driver can follow the hill technique perfectly and still park unlawfully if a sign, curb marking or restricted location prohibits stopping or parking.
Read the signs before you focus on the slope. A no-parking sign can override the safe wheel position, and restrictions around intersections, fire hydrants and crosswalks can make a space unsuitable. Curb markings may also communicate restrictions, so don't assume an unmarked residential curb means parking is allowed.
Separate safety from permission
Use two questions whenever you approach a hill:
- Is the vehicle secured? Check the slope, curb, wheel direction, parking brake and transmission setting.
- Is parking permitted here? Scan signs, curb markings, nearby intersections, hydrants and crossings.
The first question is about preventing unintended movement. The second is about whether you're allowed to occupy the space at all. They're related, but they aren't interchangeable.
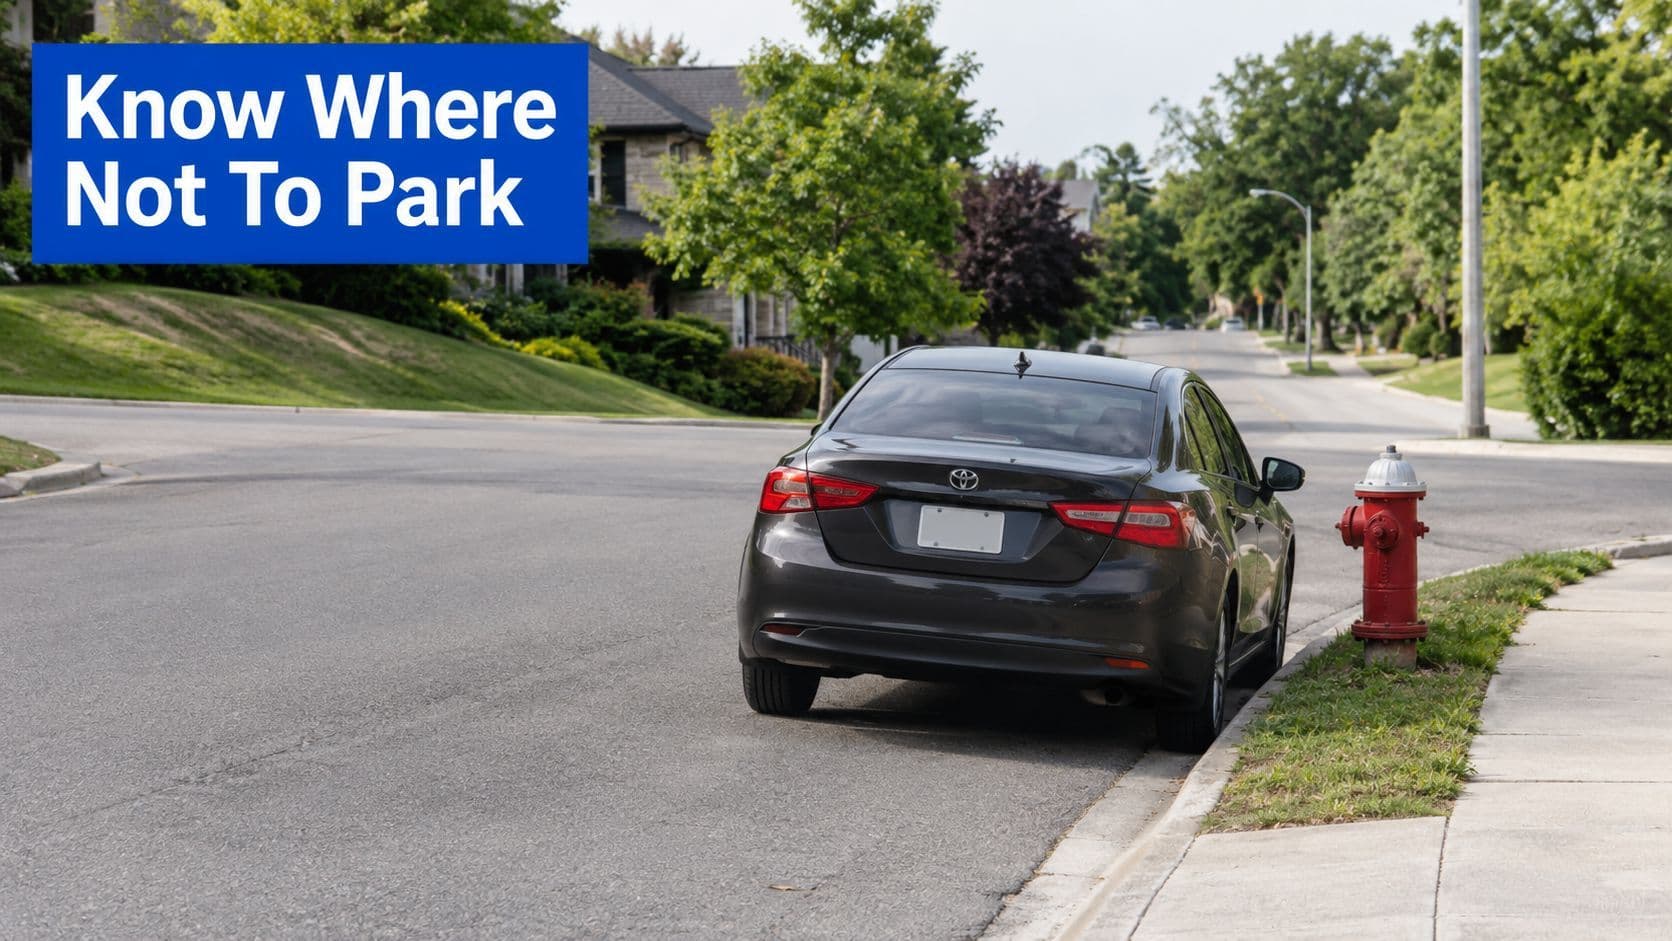
A hill can make a restricted location harder to judge because the roadway rises or falls away from you. For example, you might notice a convenient gap near a crosswalk but overlook a sign positioned behind your vehicle. Walk your eyes along the block, not just the few metres beside the driver's door.
The safest study approach is to learn the technique and the restrictions as separate ideas, then combine them in practice questions. The G1 parking rules guide for Ontario can help you review the legal side alongside hill-parking situations.
If a sign is unclear, choose another location rather than treating uncertainty as permission. A properly angled vehicle in a prohibited space remains a parking problem, and enforcement concerns are especially serious where a rolling vehicle could interfere with traffic or vulnerable road users.
Common Hill Parking Mistakes That Cost G1 Marks
Many learners make the same assumption: selecting Park is enough. It isn't. The Ontario handbook's hill-parking rule treats the transmission, parking brake and wheel angle as connected safeguards, so leaving out one part weakens the system.
The wheel points the wrong way
A driver facing uphill with a curb may turn right because they remember that downhill parking uses the right position. That answer ignores the curb. In the uphill-with-curb situation, the wheel should turn left so the front tires can rest against the curb if the vehicle rolls back.
Another learner leaves the wheels straight because the car feels stable. Straight wheels don't direct a possible roll towards a safer stopping point. Ask yourself where the vehicle would travel if the brake released, then choose the angle that keeps it away from traffic.
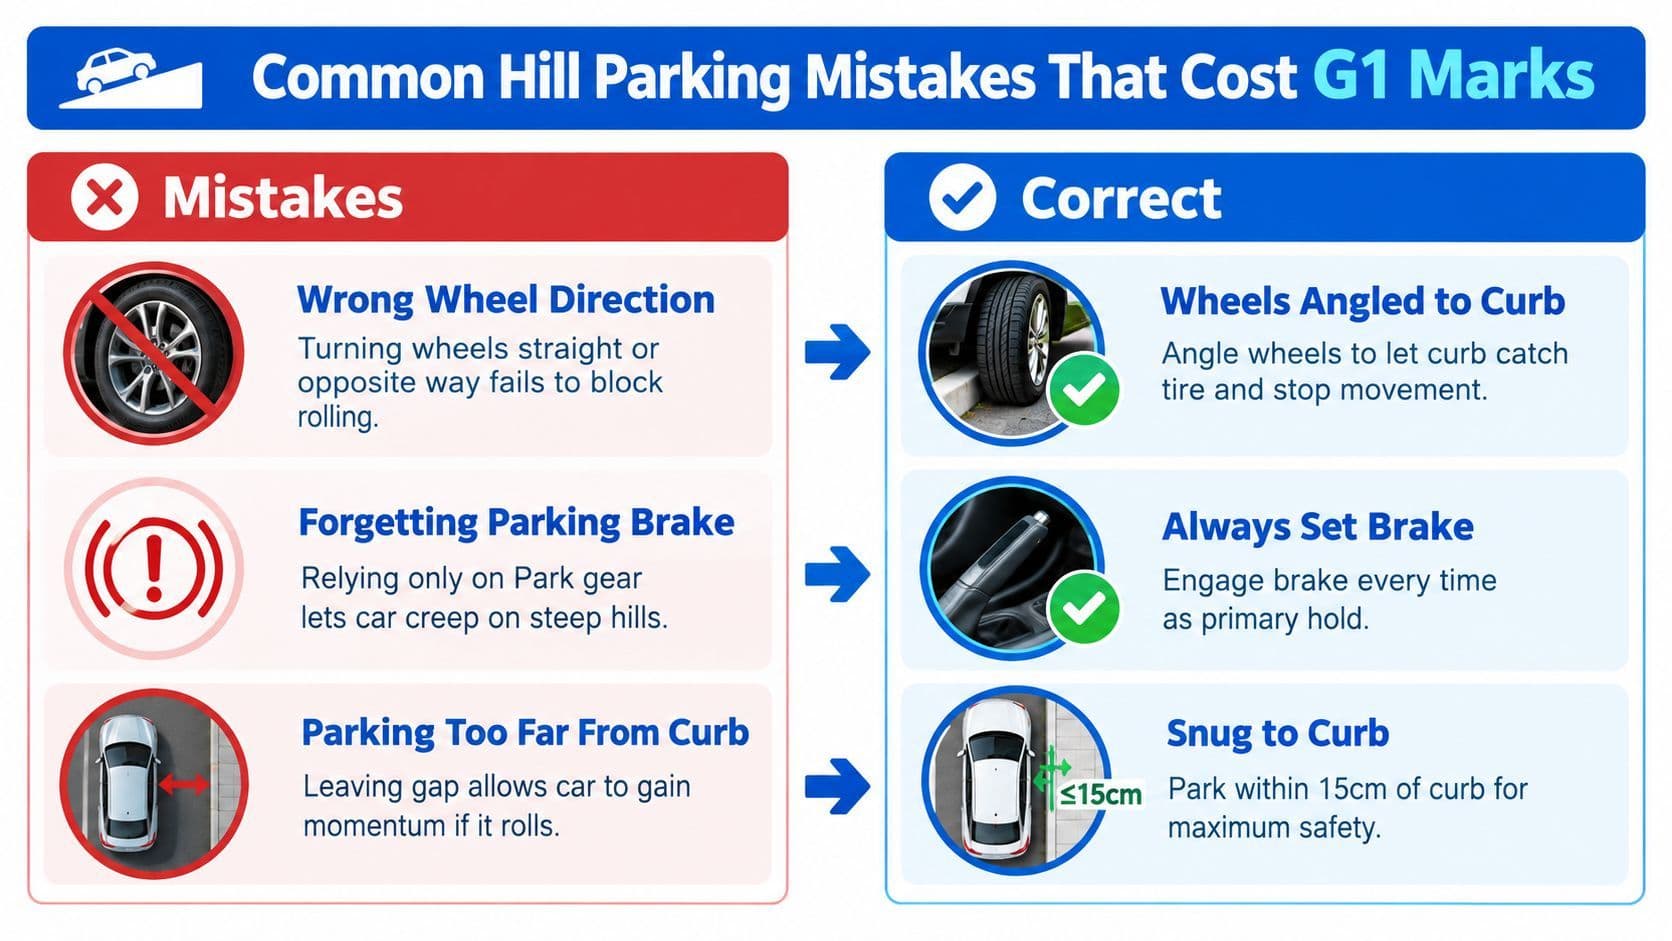
The backup layers disappear
Forgetting the parking brake is another serious error. Leaving the vehicle in Neutral is also unsafe because it removes the resistance provided by the appropriate transmission setting. Parking too far from the curb creates more space for a rolling vehicle to gain movement before reaching the edge.
Remember: Wheel angle manages direction. The parking brake and gear help hold the vehicle.
Use this self-check during practice:
- Wrong wheel direction: Recreate the slope and curb before turning the steering wheel.
- No parking brake: Engage it every time, even when the hill seems mild.
- Vehicle left in Neutral: Select Park for an automatic, or first/reverse gear for a manual.
- Large gap from the curb: Pull close and parallel without touching the curb.
- Slope ignored: Determine whether the vehicle faces uphill or downhill before deciding anything.
A nervous learner often rushes because the space behind them feels pressuring. Slow the process down and say the decision: “Uphill, curb, left,” or “Downhill, right.” That short verbal cue can stop a memorised answer from replacing the actual road situation.
Practice Like the G1 and Park With Confidence
G1-style questions often describe a scene rather than naming the answer. Read the details in order. First identify whether the vehicle faces uphill or downhill. Then look for a curb. Finally decide where a rolling vehicle should go, and select the wheel direction that creates that safer path.
Try these practice stems:
- You're facing uphill beside a curb. What should you do? Turn the wheels left so the front tires can rest against the curb if the vehicle rolls back.
- You're facing uphill with no curb. Which way should the wheels point? Turn them sharply right, towards the shoulder and away from traffic.
- You're facing downhill. What is the wheel position? Turn the wheels right towards the curb or shoulder.
- What else must you do in every hill-parking situation? Set the parking brake and use Park in an automatic, or first/reverse gear in a manual.
The goal isn't to rush through a memorised phrase. It's to build a repeatable mental model: slope, curb, roll direction, wheel angle, brake and gear. If a question includes a legal restriction, treat that as a separate check because safe positioning doesn't make prohibited parking lawful.
Parking practice also benefits from the same controlled observation used in other manoeuvres. Review parallel parking for the driving test to strengthen your positioning habits, then practise identifying hill conditions from different approaches.
Keep your answer simple on test day. For uphill with a curb, think left. For uphill without a curb, think sharply right. For downhill, think right. Add the parking brake and the correct gear every time, and you'll be applying a safety system rather than guessing.
Use G1ready.ca to practise Ontario parking questions, review explanations and work through targeted G1 preparation before test day. Visit the platform, test yourself on hill-parking scenarios and use the feedback to correct wheel-direction, parking-brake and transmission mistakes.


